A few days ago, I spent the day in Spokane with my dad for one of his follow-up appointments with his kidney transplant team. It was a good day, but it was also a long one.
This post contains affiliate links. As an Amazon Associate and Walmart Creator, I earn from qualifying purchases. I may also earn a commission through other affiliate programs at no extra cost to you. I only share products I genuinely find useful or interesting.
By the time I woke up on the fourth morning afterward, I knew I was paying for it. My energy was completely gone, and my knees were aching before I even got out of bed. If you live with a chronic illness, you probably know that feeling all too well—sometimes a perfectly worthwhile day still asks for a few days of recovery afterward.
I thought about dragging out our big electric heating pad, but it’s designed for shoulders and backs. It’s wonderful for those jobs, but for sore knees it felt unnecessarily bulky, and honestly, I just didn’t have the energy to wrestle with it.
Then I remembered something I hadn’t made in years.
When my kids were little, I used to make simple DIY microwave heating pads from socks and rice. They were inexpensive, easy to make, and surprisingly effective. During my second and third pregnancies, they became one of my favorite comfort items. I’d already been diagnosed with fibromyalgia by then, but because I wasn’t taking my usual pain medication during pregnancy, I relied much more on simple comforts like warm baths, gentle stretching, and these homemade heat packs.
Long days are absolutely worth it sometimes, but I’ve learned that planning for recovery afterward is just as important. If that’s something you struggle with too, you might enjoy my guide to pacing with chronic illness.
Sometimes the best ideas aren’t new ones—they’re the ones we rediscover exactly when we need them.
So if you’re looking for an inexpensive way to add a little extra comfort to sore muscles or stiff joints, here’s how to make a simple microwave heating pad using supplies you may already have at home.
Before We Get Started
I’m sharing what has worked well for me over the years, but this tutorial is intended for general informational purposes only and isn’t medical advice. Everyone’s body, health conditions, and treatment plan are different.
Heat therapy can be soothing for muscle tension, stiffness, and everyday aches, but it isn’t appropriate for every injury or medical condition. If you’re unsure whether heat is right for you, check with your healthcare provider before using a heating pad.
When using any homemade heat pack, always heat it in short intervals, test the temperature before placing it on your skin, and never use it while sleeping. If the heat pack becomes damaged or develops a scorched smell, stop using it and make a new one.
The goal of this project is simple: to create an inexpensive comfort item that can make difficult days feel a little cozier.
💚 Comfort Tip
Warm your heating pad while the kettle boils so they’re both ready at about the same time.
Why I Love Homemade Heating Pads
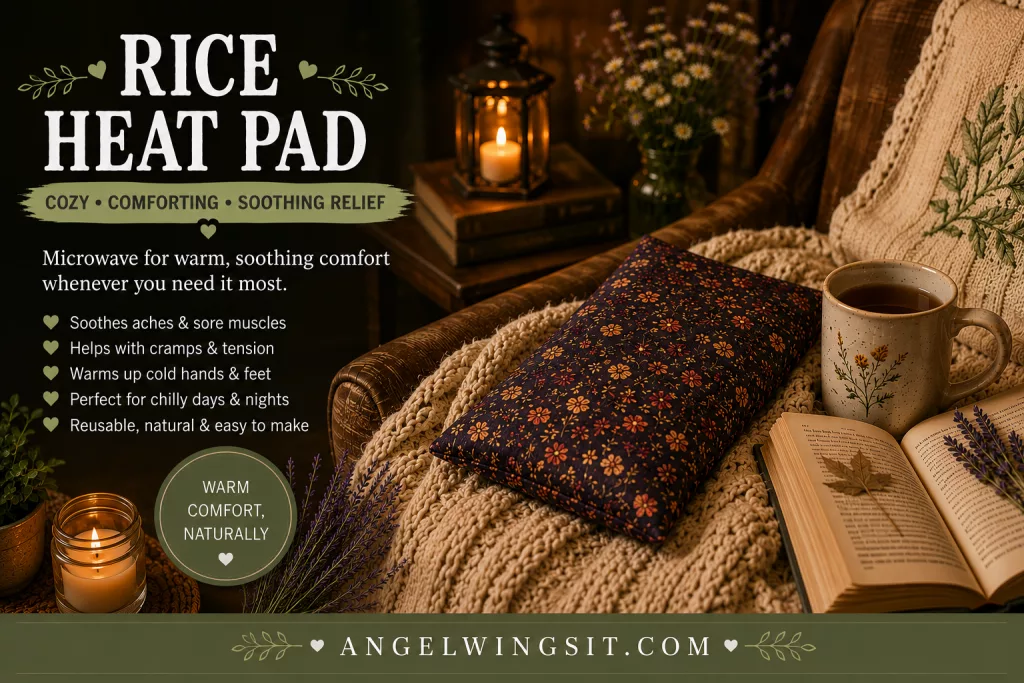
Don’t get me wrong—I have an electric heating pad, and it absolutely has its place. It’s wonderful for sore shoulders or covering a large area across my back. But when all I need is a little warmth on an aching knee, a stiff wrist, or the back of my neck, I almost always reach for a homemade heating pad instead.
Over the years, I’ve found myself coming back to these simple rice-filled heat packs for a few reasons.
They’re inexpensive.
One of the things I love most is that you can make one with supplies you may already have at home. An old cotton sock and a bag of rice can become a comforting little heat pack in just a few minutes, making this a great project if you’re trying to save money or simply enjoy practical DIYs.
They’re lightweight and flexible.
Unlike many electric heating pads, a homemade heat pack molds naturally around your body. Whether I’m resting it across my knees, wrapping it around my neck, or laying it across my lower back while I read, it feels less bulky and much easier to position exactly where I want it.
No cords, no outlets.
Sometimes I just want to curl up on the couch with a book or my crochet project without worrying about finding an outlet or getting tangled in cords. Once it’s warmed up, I can take it anywhere around the house.
They warm up quickly.
Most homemade heating pads only need a minute or two in the microwave before they’re ready to use. On days when my energy is running low, I appreciate anything that doesn’t require much effort.
They’re easy to customize.
Want a longer heat pack that wraps around your shoulders? Prefer something small enough for sore wrists or ankles? Need one that fits comfortably across your knees? You can easily adjust the size and shape to suit your needs.
You can even sew a washable cover or choose fun fabrics to make it feel a little more personal.
They make thoughtful handmade gifts.
If you enjoy making gifts, these heat packs are one of my favorites. Pair one with a cozy mug, a box of herbal tea, or a handwritten note, and you’ve created a simple comfort gift that’s both practical and heartfelt.
At the end of the day, this little project isn’t about replacing medical care or fancy gadgets. It’s about creating one more small comfort for the days when your body is asking you to slow down.
Sometimes those small comforts make all the difference.
💚 Comfort doesn’t have to be complicated.
Some of my favorite things for flare days cost very little to make—a homemade heating pad, a mug of tea, my DIY electrolyte drink, a soft blanket, and permission to rest.
What You’ll Need
The best part about this project is that you probably already have most of the supplies at home. You don’t need special fabrics or expensive materials—just a few simple items and about ten minutes of your time.
For the No-Sew Version
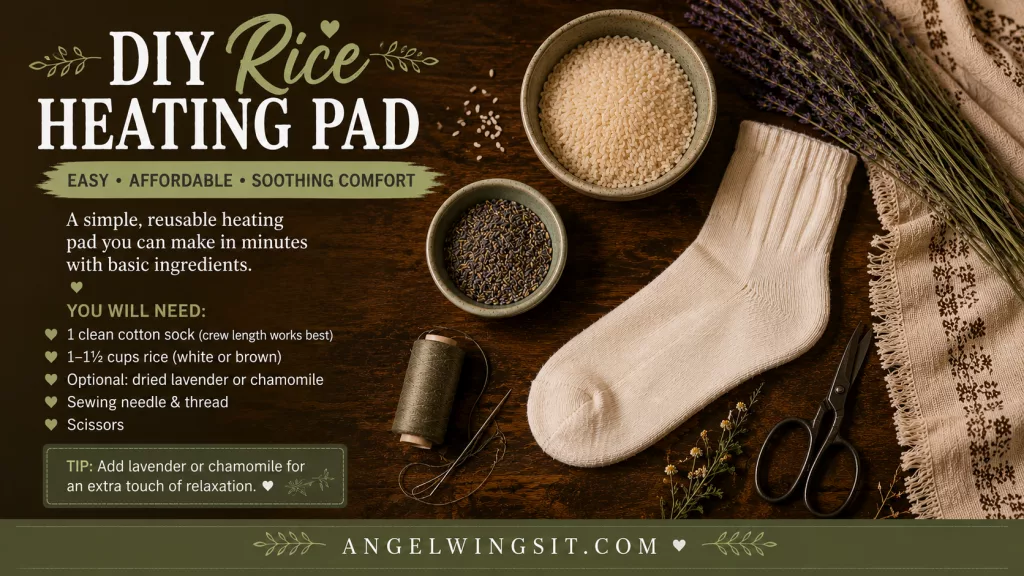
- A clean cotton tube sock (avoid socks with a high synthetic fiber content if possible)
- Uncooked white rice (about 3–5 cups depending on the size of your sock)
- A funnel or a sheet of paper rolled into a cone
- Twine, ribbon, or a sturdy rubber band to tie the end closed
For the Sewn Version
- 100% cotton fabric (fat quarters or fabric scraps work beautifully)
- Needle and thread or a sewing machine
- Uncooked white rice
- A funnel
- Pins or fabric clips (optional)
If you’re starting from scratch, I’ve rounded up my favorite affordable supplies in my
Optional Add-Ins
If you’d like to personalize your heating pad, you can also add:
- Dried lavender buds for a calming scent
- Dried chamomile flowers
- A removable washable fabric cover
- Pretty ribbon if you’re giving it as a gift
I generally keep mine simple with just rice because it’s inexpensive, easy to replace, and doesn’t aggravate my scent sensitivities.
🌿 Budget Tip
An old clean cotton sock and a bag of rice can make a heating pad that lasts for years.
Choosing the Right Sock or Fabric
Not all fabrics are created equal when it comes to microwave heating pads.
Look for natural fibers like cotton or linen whenever possible. These materials tolerate repeated heating better than synthetic fabrics and allow the heat to distribute more evenly.
I also recommend avoiding fabrics with:
- Metallic threads
- Sequins or embellishments
- Plastic decorations
- Waterproof coatings
If you’re using an old sock, choose one that’s still in good condition without holes or thin worn spots.
Remember, this little heating pad may spend years being warmed in the microwave, so it’s worth starting with sturdy materials.
Why I Prefer Plain White Rice
You’ll see lots of suggestions online for different fillings, but plain white rice is still my favorite.
It checks all the boxes:
✔ Affordable
✔ Easy to find
✔ Holds heat well
✔ Flexible enough to mold around sore joints
✔ Easy to replace if needed
It’s also what I’ve used for years, so it’s the filling I know and trust.
Don’t worry, though—if you’re curious about other options, we’ll compare them next.
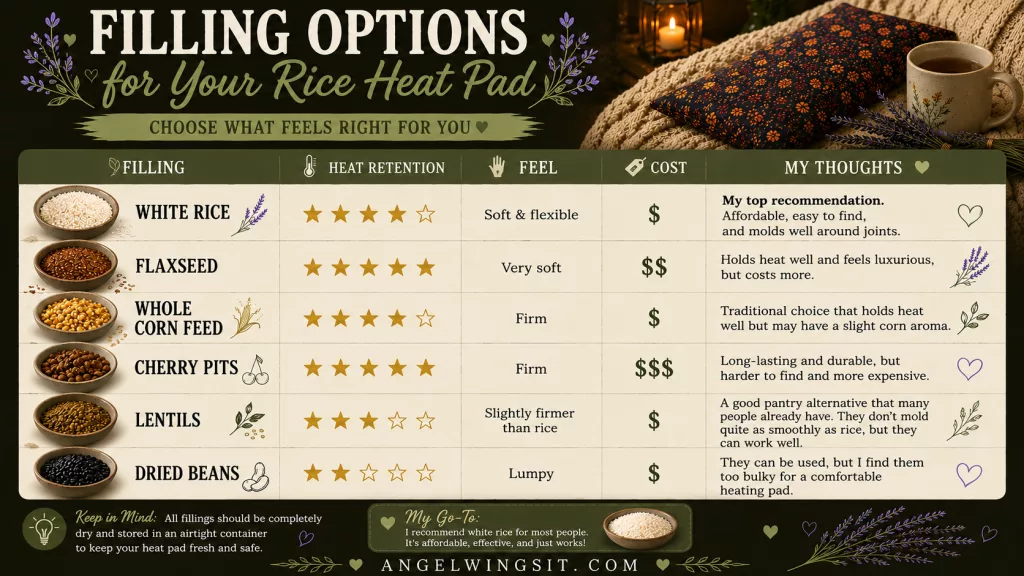
| Filling | Heat Retention | Feel | Cost | My Thoughts |
|---|---|---|---|---|
| White Rice | ★★★★☆ | Soft & flexible | $ | My top recommendation. Affordable, easy to find, and molds well around joints. |
| Flaxseed | ★★★★★ | Very soft | $$ | Holds heat well and feels luxurious, but costs more. |
| Whole Corn Feed | ★★★★☆ | Firm | $ | Traditional choice that holds heat well but may have a slight corn aroma. |
| Cherry Pits | ★★★★★ | Firm | $$$ | Long-lasting and durable, but harder to find and more expensive. |
| Lentils | ★★★☆☆ | Slightly firmer than rice | $ | A good pantry alternative that many people already have. They don’t mold quite as smoothly as rice, but they can work well. |
| Dried Beans | ★★☆☆☆ | Lumpy | $ | They can be used, but I find them too bulky for a comfortable heating pad. |
Can I use other dried grains or legumes?
Yes! Many homemade heating pads are made with pantry staples like rice, lentils, whole corn feed, or other dried grains and legumes. The best choice often comes down to what you have on hand and the feel you prefer. I still reach for plain white rice because I like how soft and flexible it is, especially when I’m using it on my knees or around my neck.
If you’re standing in your pantry wondering what to use, don’t overthink it. If you have a bag of plain white rice, you’ve got everything you need to make a cozy, practical heating pad in just a few minutes.
Preparing Your Heating Pad
Before you start filling your sock or sewing your fabric, take a minute to decide what size heating pad will work best for you.
I’ve made several over the years, and I’ve found that different sizes are useful for different aches and pains.
Small Heat Pack
Perfect for:
- Wrists
- Hands
- Ankles
- Sinuses (cooled, not heated)
- Elbows
Medium Heat Pack
My favorite all-around size.
Great for:
- Knees
- Neck
- Shoulders
- Lower back
Long Heat Pack
Ideal for:
- Across your shoulders
- Around your neck
- Along your spine
- Across both knees while relaxing
Remember not to pack the filling too tightly. Leaving a little room allows the rice to shift and mold comfortably around your body.
As a general rule, I fill my heating pads about two-thirds to three-quarters full. That gives them enough flexibility to drape naturally while still holding plenty of warmth.
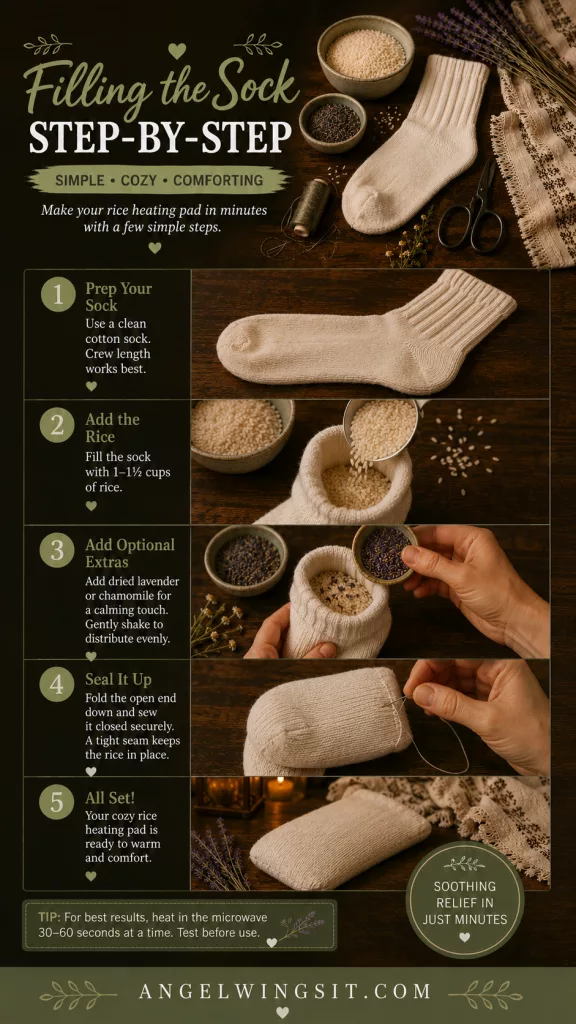
How to Make a No-Sew DIY Microwave Heating Pad in 5 Minutes
If you’ve never made a homemade heating pad before, this is the method I recommend starting with. It’s incredibly simple, doesn’t require any sewing, and takes about five minutes from start to finish.
I’ve made these on and off for years, and they’re still my favorite because they’re quick, inexpensive, and surprisingly comfortable. The soft cotton sock allows the rice to shift naturally, so it wraps nicely around sore knees, shoulders, or the back of your neck.
Step 1: Choose Your Sock
Start with a clean cotton tube sock.
A longer sock gives you more flexibility, making it easier to wrap around your neck or drape across your knees, while a shorter sock works well for smaller areas like wrists or ankles.
Avoid socks with holes, thin worn spots, metallic threads, or decorative embellishments.
Step 2: Fill the Sock
Place a funnel into the opening of the sock. If you don’t have a funnel, simply roll a sheet of paper into a cone and tape the edge.
Slowly pour uncooked white rice into the sock.
Stop every now and then to gently shake the sock so the rice settles evenly.
Rather than measuring an exact amount, fill the sock until it’s about two-thirds to three-quarters full.
Leaving a little empty space allows the rice to move around, helping the heating pad mold comfortably to your body.
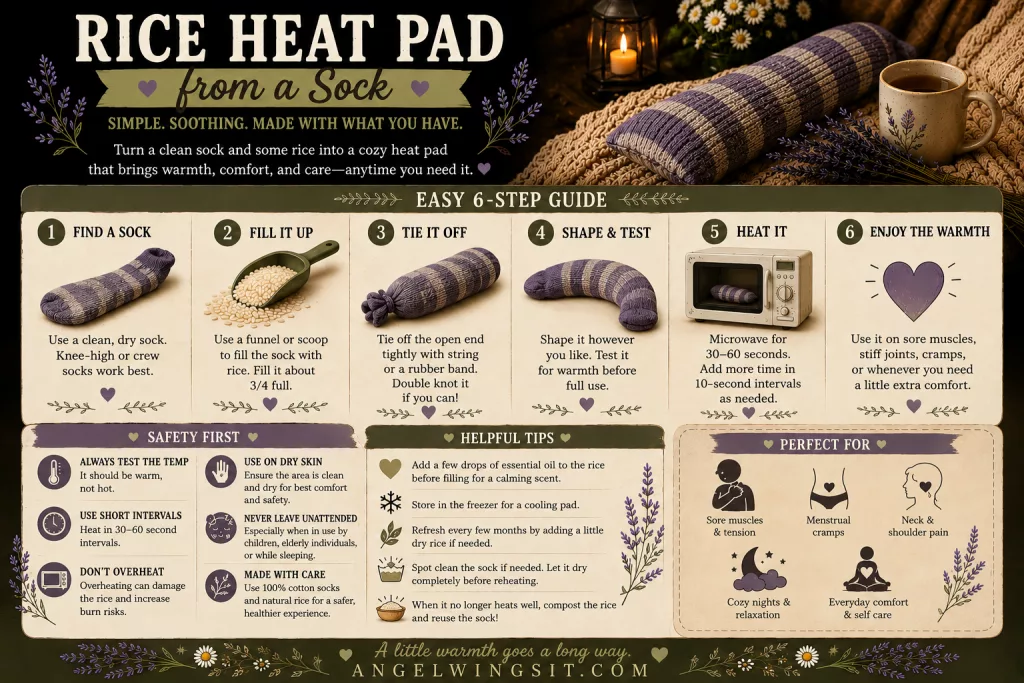
Step 3: Secure the Opening
Once you’re happy with the amount of rice, squeeze out as much excess air as you can.
Twist the top of the sock a few times, then tie it securely using:
- Cotton twine
- Ribbon
- Strong cotton string
- A sturdy rubber band
Give the sock a gentle tug to make sure the opening is secure and the rice can’t escape.
Step 4: Shape Your Heating Pad
Massage the rice gently with your hands to spread it evenly throughout the sock.
This helps eliminate lumps and creates a smooth, flexible heating pad that’s comfortable to drape over sore muscles and joints.
Step 5: Warm It Up
Place the heating pad in the microwave and heat it in 30-second intervals, checking the temperature after each interval until it reaches a comfortable warmth.
Before placing it on your skin, always test the temperature with your hands or the inside of your wrist.
Now it’s ready to use whenever you need a little extra comfort.
That’s it!
Sometimes the simplest projects end up becoming the ones we use the most, and this little rice sock has certainly earned its place in my home over the years.
🛒 My Favorite Supplies
I’ve gathered the rice, socks, funnels, sewing supplies, and other items I use most often into one easy collection if you’d like to recreate this project.
How to Sew a Fabric DIY Microwave Heating Pad
If you’d like something a little more polished than a sock, a simple fabric heating pad is just as easy to make. Don’t worry if you’re not an experienced sewer—I certainly wouldn’t call myself one!
In fact, my grandmother tried teaching me to use a sewing machine years ago. After watching me sew an impressively crooked line, and jamming her machine, she eventually sighed, unpicked every stitch, and finished the blanket herself. To this day, I still reach for hand sewing whenever I make little projects like this.
The good news? A heating pad doesn’t need perfect stitches to do its job.
What You’ll Need
- Two pieces of 100% cotton fabric, approximately 8 x 12 inches (or whatever size you’d like your finished heating pad to be)
- Needle and thread
- Straight pins or fabric clips (optional)
- Uncooked white rice
- A funnel or paper cone
- Scissors
Step 1: Cut Your Fabric
Place your two pieces of fabric with the right sides facing each other (if your fabric has a printed side). If you’re using solid fabric, either side is fine.
Step 2: Sew Around the Edges
Using a simple running stitch or backstitch, sew around all four sides, leaving a 2 to 3-inch opening on one end for filling.
Your stitches don’t have to be perfectly straight or tiny. Just try to keep them fairly close together so the rice can’t work its way through the seams.
Step 3: Turn It Right Side Out
Reach through the opening and gently turn the fabric right side out.
Use your fingers or the eraser end of a pencil to carefully push out the corners.
Step 4: Fill with Rice
Using a funnel, slowly fill the heating pad until it’s about two-thirds to three-quarters full.
Resist the temptation to overfill it. Leaving a little empty space allows the rice to move around, helping the heating pad drape comfortably over sore knees, shoulders, or your neck.
Step 5: Close the Opening
Fold the raw edges of the opening inward about ¼ inch.
Using a simple whip stitch or ladder stitch, sew the opening closed as neatly as you can.
Don’t stress if your stitches are visible—this is a comfort item, not a sewing competition.
Step 6: Enjoy Your Handmade Heating Pad
Give your heating pad a gentle shake to distribute the rice evenly.
Now it’s ready to warm up and enjoy whenever you need a little extra comfort.
⚠️ Safety Reminder
Always heat in short intervals and test the temperature before placing it on your skin.
One of the things I love most about the fabric version is that you can personalize it. Choose cheerful prints, calming florals, cozy flannel for cooler months, or fabrics that remind you of someone you love. These also make thoughtful handmade gifts for friends and family who could use a little extra comfort.
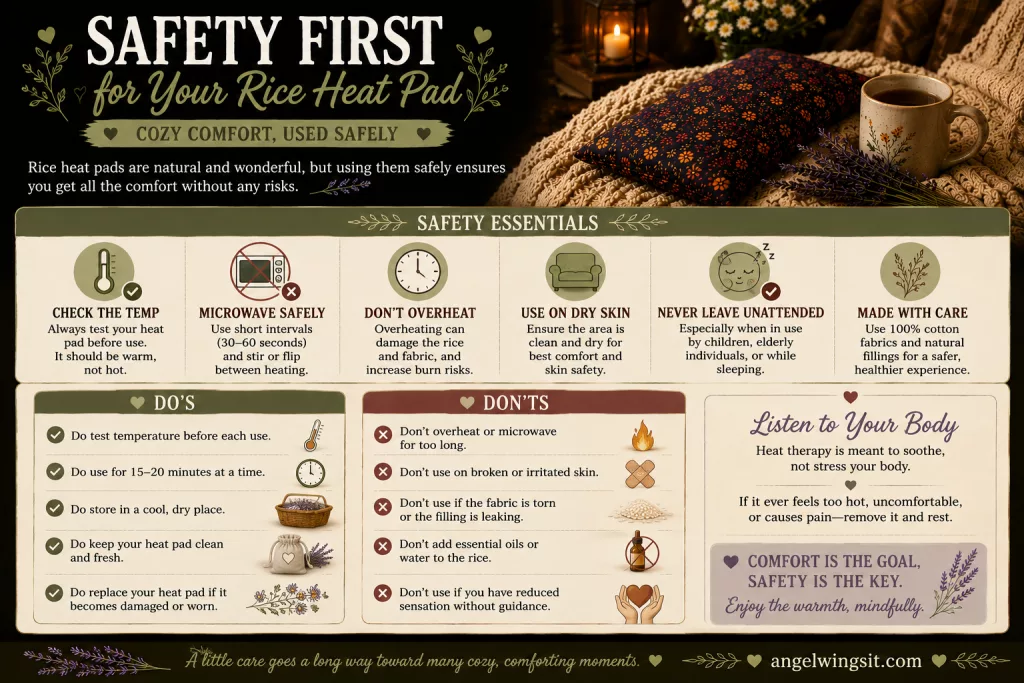
How to Use Your Homemade Heating Pad Safely
Homemade heating pads are wonderfully simple to make, but they do need to be used with a little care. Following a few basic safety guidelines will help your heating pad last longer and keep it comfortable to use.
Heating Your Heat Pack
Place your heating pad in the microwave and heat it in 30-second intervals, checking it after each interval until it reaches a comfortable temperature.
The exact heating time will depend on:
- The size of your heating pad
- How much rice it contains
- The wattage of your microwave
Most smaller heating pads are ready in about 1 to 2 minutes.
Always Test the Temperature First
Before placing the heating pad on your skin, carefully test it with your hands or the inside of your wrist.
It should feel pleasantly warm—not painfully hot.
If it feels too hot, allow it to cool for a few minutes before using it.
Never Leave It Unattended
Stay nearby while your heating pad is in the microwave.
Although homemade heating pads are generally very safe when used correctly, overheating can scorch the rice or damage the fabric.
Don’t Sleep With It
As cozy as it feels, avoid using any heating pad while sleeping. You may not notice if it becomes too hot or stays against one area of your body for too long.
Store It Somewhere Dry
When you’re finished using your heating pad, allow it to cool completely before storing it in a dry place.
Keeping moisture away from the rice will help extend its life.
When It’s Time to Replace It
It’s time to make a new heating pad if you notice:
- A burnt or scorched smell
- Torn fabric or leaking rice
- Mold or moisture inside the filling
- Significant discoloration from overheating
Fortunately, homemade heating pads are inexpensive to replace, and once you’ve made one, making another only takes a few minutes.

Frequently Asked Questions
How long should I microwave a homemade rice heating pad?
Start by heating your heating pad in 30-second intervals, checking it after each interval until it reaches a comfortable temperature.
The exact heating time will vary depending on the size of your heating pad, how much rice it contains, and the wattage of your microwave. For most homemade heating pads, 1 to 2 minutes is plenty.
How long does a homemade heating pad stay warm?
Most rice heating pads stay comfortably warm for about 20 to 30 minutes, although larger heat packs may stay warm a little longer.
If you need more warmth, simply allow it to cool slightly before reheating it according to the safety guidelines above.
Can I wash a homemade heating pad?
Because the filling should stay dry, the heating pad itself isn’t machine washable.
If it needs a little freshening up, wipe the outside with a slightly damp cloth and allow it to dry completely before using it again.
If you’d like something that’s easier to clean, consider sewing a removable washable fabric cover.
Can I freeze a rice heating pad?
Yes! Many people enjoy using the same heating pad as a cold pack.
Place it inside a sealed freezer bag to help protect it from moisture, then chill it in the freezer for several hours before use. The cool temperature can feel especially refreshing during hot weather or after a long day.
Can I add lavender or other herbs?
Absolutely! Dried lavender buds are one of the most popular additions because they add a light, relaxing fragrance when the heating pad is warmed.
If you have asthma, allergies, migraines, MCAS, or scent sensitivities, you may prefer to skip scented additions altogether. A plain rice heating pad works beautifully on its own.
Why does my heating pad smell like popcorn?
A light toasted smell can sometimes happen as the rice warms, especially the first few times it’s heated.
However, if you notice a strong burnt smell or see scorch marks on the fabric, discontinue use and make a new heating pad. Overheating can damage both the rice and the fabric.
How long will a homemade heating pad last?
With proper care, many homemade heating pads last for years.
Replace yours if the fabric becomes worn, the seams begin to open, moisture gets inside, or the rice develops a persistent burnt smell.
Can I use brown rice instead of white rice?
You can, but I generally recommend plain white rice.
Brown rice contains more natural oils, which may shorten its shelf life over time. White rice is inexpensive, easy to find, and has worked well for me for many year
What is the best filling for a homemade heating pad?
There isn’t one perfect answer—it depends on your preferences.
For most people, plain white rice is an excellent choice because it’s affordable, readily available, flexible, and molds comfortably around sore joints.
Other popular fillings include flaxseed, whole corn feed, lentils, and cherry pits.
🌿 Before You Go…
If today is one of those days where your body is asking you to slow down, I hope this little project brings you a bit of comfort.
You don’t have to earn rest.
You don’t have to wait until everything is finished before you care for yourself.
Sometimes the kindest thing you can do is warm a homemade heating pad, pour yourself a cup of tea, and simply breathe for a few quiet minutes.
Tomorrow’s to-do list will still be there.
For now, I hope you find a little warmth, a little comfort, and a reminder that even small acts of care matter.
Continue Your Comfort Journey
If today’s project was helpful, here are a few more reader favorites:
🛋️ Pacing with Chronic Illness: A Practical Guide for Managing Chronic Fatigue
🧶 No Count Crochet Projects for Brain Fog Days
🍵 DIY Bath Salts for Achy Days