
Sometimes a pattern happens because you sit down intending to make something completely different.
This post contains affiliate links. As an Amazon Associate and Walmart Creator, I earn from qualifying purchases. I may also earn a commission through other affiliate programs at no extra cost to you. I only share products I genuinely find useful or interesting.
I was working out the stitch pattern for my Holly Berry Scarf when I realized my little test swatch was starting to look suspiciously mug-cozy-sized.
Well.
Far be it from me to argue with the yarn.
So before the scarf was even finished, the Holly Berry Mug Cozy was born.
This is a quick little Christmas crochet project made with bright green yarn, rows of raised red berry stitches, and a snowy white crab-stitch border. The loops at each end wrap around the mug handle, which gives the cozy a little flexibility for fitting different mugs.
And because it’s only nine rows, it’s a nice project when you want to make something festive without accidentally committing yourself to Christmas Crochet Project #47.
Looking for more quick holiday projects? Browse my 20+ Free Christmas Crochet Patterns for ornaments, amigurumi, gifts, home decor and more.
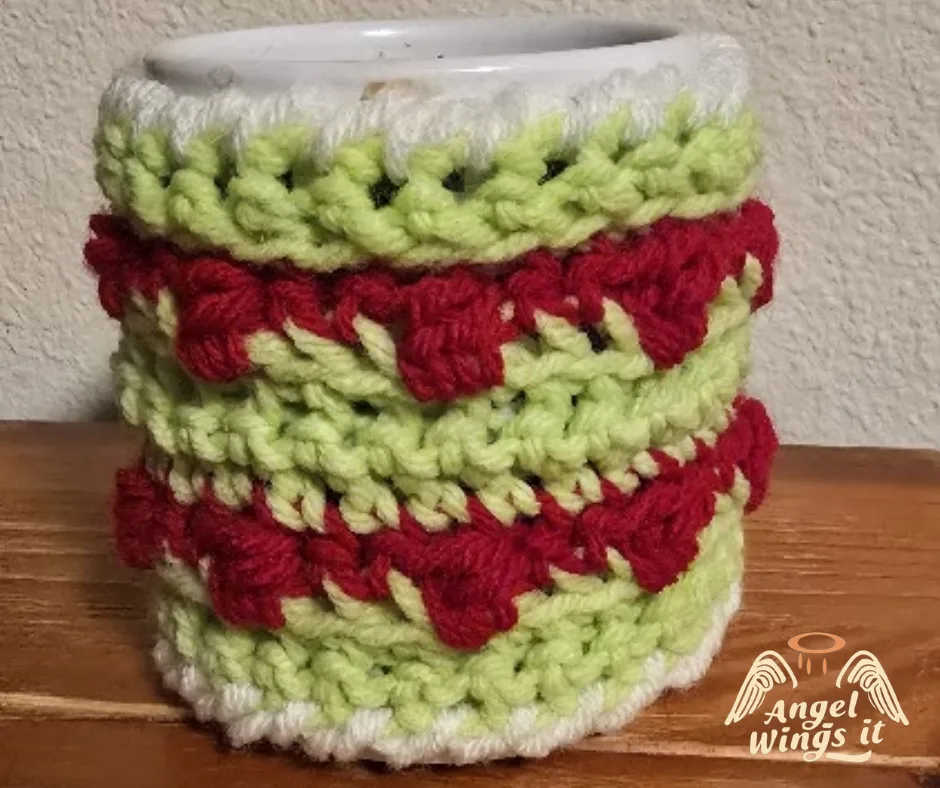
Holly Berry Mug Cozy at a Glance
- Skill level: Advanced beginner
- Yarn: #4 worsted-weight acrylic
- Hook: 5.0 mm (H-8)
- Construction: Worked flat in rows
- Finished size: Approximately 9″ × 3½”, excluding loops
- Fit: Comfortable on a mug approximately 12″ around; snugger on a 13″ mug
- Closure: Two crocheted loops wrap around the mug handle
- Techniques: Single crochet, FLO/BLO crochet, berry stitch, color changes and crab stitch
Why the Holly Berry Stitch Works
The texture is what makes this simple little rectangle look Christmassy.
The green rows alternate between front-loop-only and back-loop-only single crochet, creating subtle ridges in the fabric. The red berries sit on top of that texture rather than disappearing into it.
And although I call this a berry stitch, we’re only using the puff portion of my usual berry stitch here.
Normally I anchor my berry between regular single crochets. In this pattern, the surrounding stitches need to be worked through the front loop, so I’ve written those stitches separately in the row instructions.
It sounds more complicated than it is.
Once you’ve made the first berry row, you’ve got it.
Stocking up for holiday projects? I put the yarn, hooks, stuffing, finishing supplies and other useful basics in my Christmas Crochet Essentials Idea List.
Materials
You’ll need:
- #4 worsted-weight acrylic yarn
- Green — I used Mainstays in Spring Green
- Red — I used Red Heart Super Saver in Red
- White — a small amount of scrap acrylic for the border
- 5.0 mm (H-8) crochet hook
- Yarn needle
- Scissors
This is also a good scrap-yarn project. You need considerably less red and white than green, so there’s no reason to open a new skein if you’ve already got suitable leftovers.
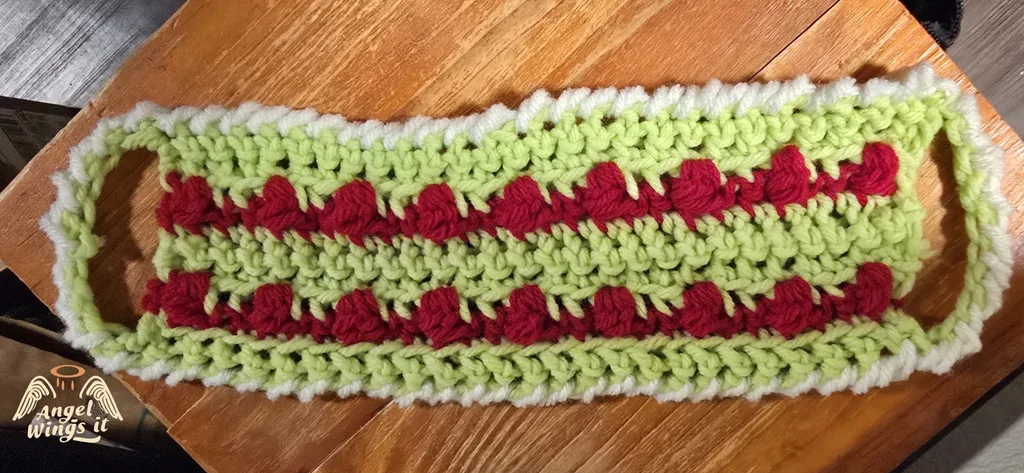
Finished Size & Fit
The finished body measures approximately:
9″ wide × 3½” tall
That’s measured flat and does not include the closure loops.
Each loop extends approximately 1½” from the edge of the cozy.
My Holly Berry Mug Cozy sample fits comfortably on a mug measuring approximately 12″ around. I also tested it on a 13″ mug, where it fits more snugly.
Because both the crocheted fabric and handle loops have some stretch, it may fit a slightly larger mug as well, but mug shape and handle size make a difference.
Adjusting for Your Mug
Before adding the final white edging, try the cozy on the mug you plan to use.
If you need more room around the handle, add chains to the closure loops.
For a smaller mug, make the loops shorter.
That little bit of adjustability is one of the reasons I like this closure better than turning the cozy into a permanently joined tube.
Abbreviations
- ch — chain
- sc — single crochet
- FLO — front loop only
- BLO — back loop only
- st(s) — stitch(es)
- f/o — fasten off
Special Stitch: Berry Stitch
Berry stitch: Yarn over, insert hook into the next stitch, yarn over and pull up a loop. (3 loops on hook.)
Yarn over and pull through the first loop only.
Yarn over, insert hook into the same stitch, yarn over and pull up a loop. (5 loops on hook.)
Yarn over and pull through all 5 loops.
Berry tip: Keep your tension relaxed. If you crochet this stitch too tightly, getting through those five loops becomes considerably less fun.
In this pattern, the FLO single crochets surrounding each berry are written separately in the row instructions.
Free Holly Berry Mug Cozy Crochet Pattern
Foundation
Ch 28.
Row 1
Starting in the first back bump from the hook, sc in each back bump across.
Turn without chaining.
(27 sts)
Row 2
Sc in first st, FLO sc in next 25 sts, sc in last st.
Turn.
(27 sts)
Row 3 — Berry Row
Change to red.
Sc in first st, berry stitch, *FLO sc in next 2 sts, berry stitch* 8 times, sc in last st.
Change back to green.
Turn.
(27 sts)
Row 4
Sc in first st, FLO sc in next 25 sts, sc in last st.
Turn.
(27 sts)
Row 5
Sc in first st, BLO sc in next 25 sts, sc in last st.
Turn.
(27 sts)
Row 6
Sc in first st, FLO sc in next 25 sts, sc in last st.
Turn.
(27 sts)
Row 7 — Berry Row
Change to red.
Sc in first st, berry stitch, *FLO sc in next 2 sts, berry stitch* 8 times, sc in last st.
Change back to green.
Turn.
(27 sts)
Row 8
Sc in first st, FLO sc in next 25 sts, sc in last st.
Turn.
(27 sts)
Row 9
Sc in first st, BLO sc in next 25 sts, sc in last st.
(27 sts)
Do not fasten off yet.
Make the Handle Loops
Turn your work approximately one-quarter turn so one short edge is facing you.
Sc into the first corner stitch.
Ch 8.
Sc into the final corner stitch on that same short edge.
Fasten off.
Attach green yarn to the opposite short edge.
Sc into the first corner stitch, ch 8, then sc into the final corner stitch.
Fasten off.
You should now have a loop at each short end of the cozy.
When the cozy is wrapped around the mug, both loops stretch around the mug handle to hold it in place.
Before continuing: Try the cozy on your mug now. If necessary, adjust the number of chains in the loops before adding the border.
Want something a little quirkier for the tree? Make my Free Christmas Pickle Crochet Pattern and start your own slightly ridiculous holiday tradition.
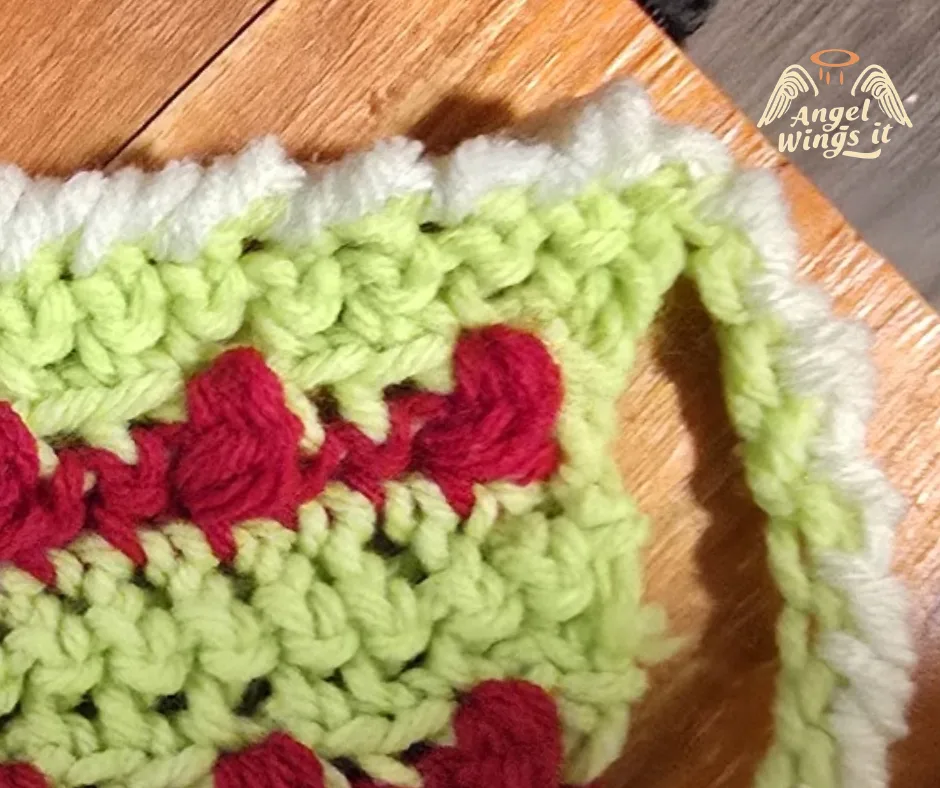
Add the Snowy White Border
Attach white yarn and work crab stitch (reverse single crochet) around the long edges of the cozy and around the closure loops.
Continue the edging so the white border follows the outside edge of the finished piece, including the chain loops.
Fasten off and weave in your ends.
Your Holly Berry Mug Cozy is finished.
A Few Color Ideas for the Holly Berry Mug Cozy
I went unapologetically Christmas with spring green, red and white, but there’s plenty of room to play with this one.
Try:
- Forest green + cranberry + cream for a more traditional look
- Sage + dusty red + ivory for softer cottage Christmas
- Deep green + burgundy + gold for something richer
- White + red berries + icy blue edging for a winter version
Or use whatever is already in the yarn bin.
Christmas does not actually inspect your dye lots.
Crocheting gifts this year? I’ve also gathered Quick and Easy Crochet Christmas Gifts with 10 more free pattern collections to explore.
Make It Part of a Handmade Christmas
The Holly Berry Mug Cozy is small enough to make as a quick Christmas gift, stocking stuffer, teacher gift or little addition to a holiday gift basket.
Pair one with a favorite mug, tea, cocoa or coffee and you’ve got a handmade gift without signing yourself up to crochet an entire blanket in December.
And if the berry-and-holly combination looks like it ought to become something bigger…
That’s because it already is.
The Holly Berry Scarf is coming next.
Apparently the test swatch had plans.
Happy hooking!