
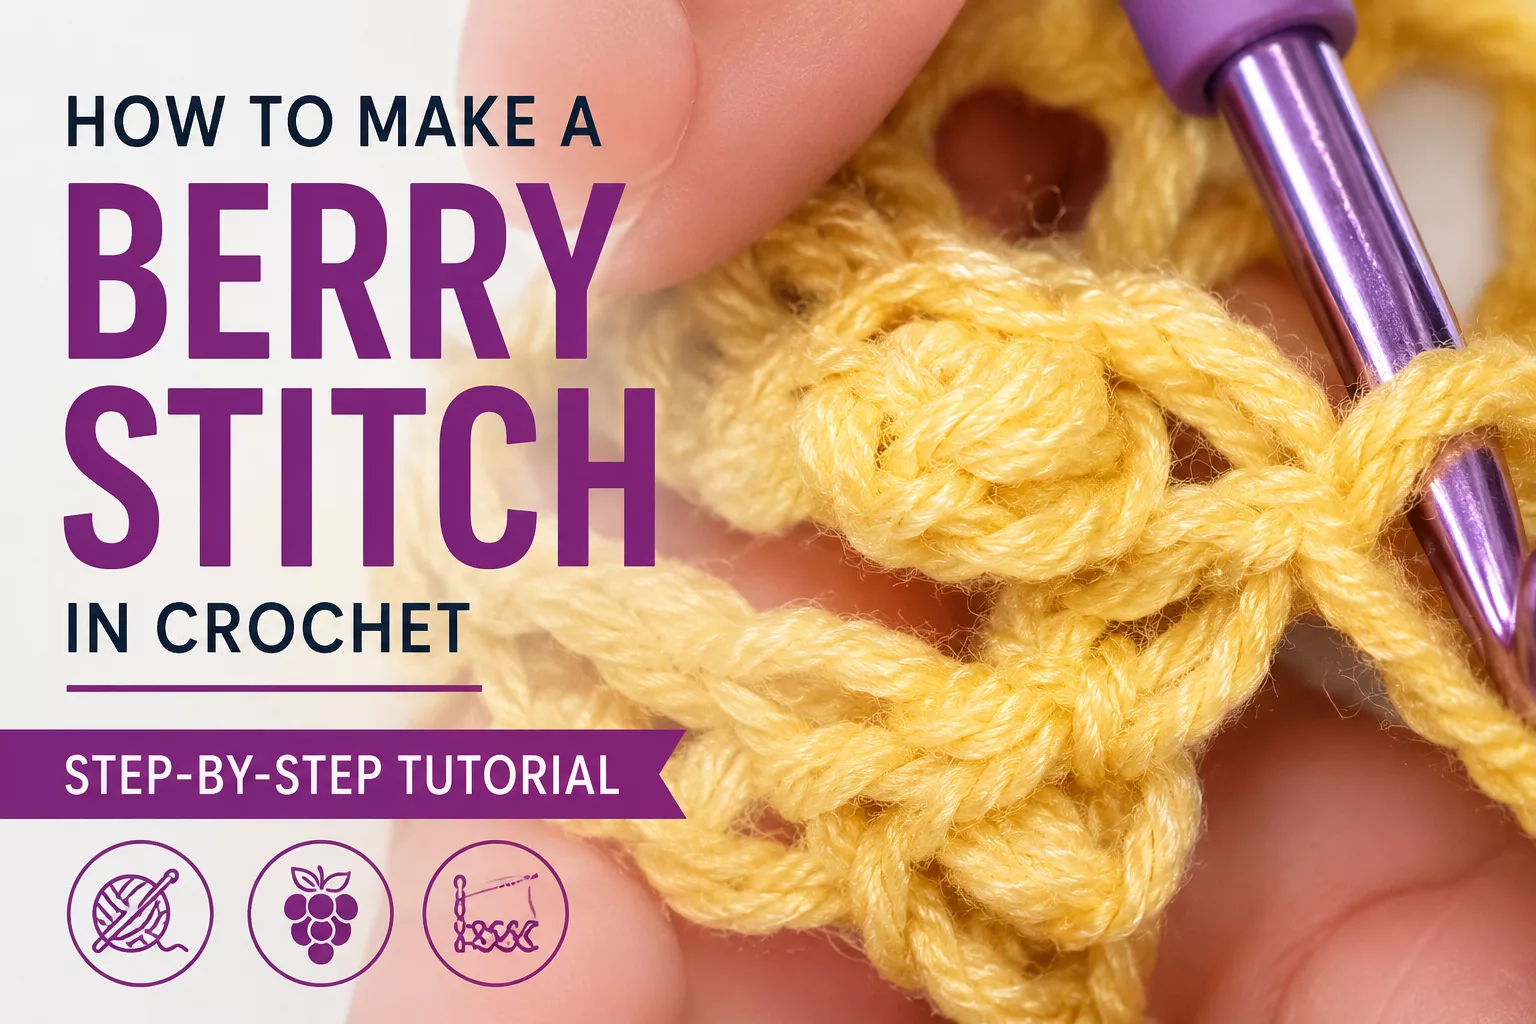
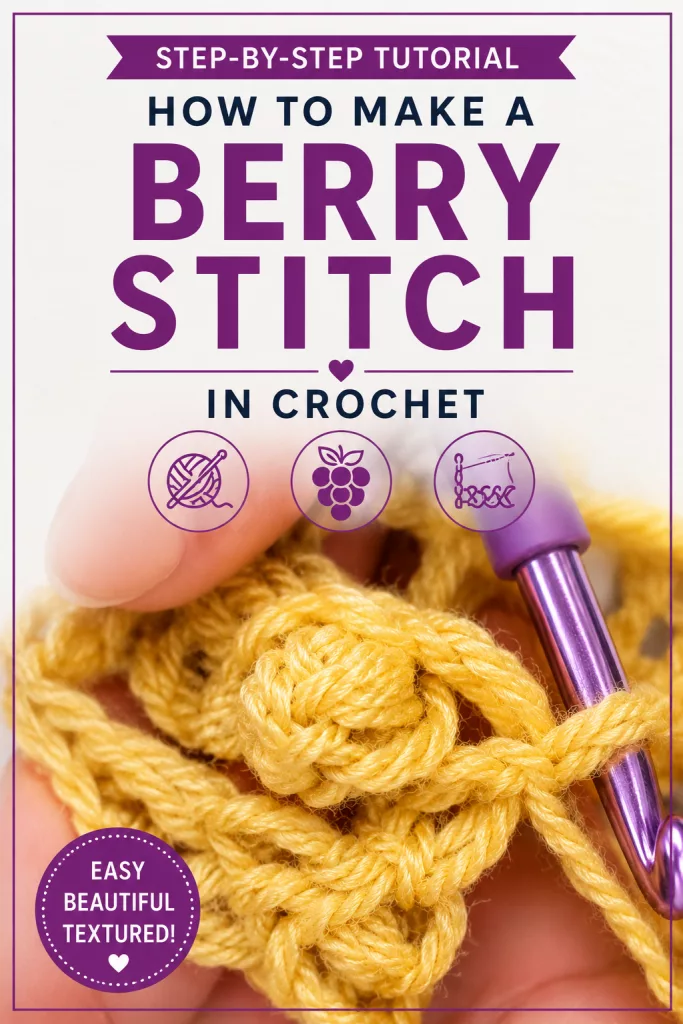
How to Make a Berry Stitch in Crochet: Step-by-Step Tutorial
This post contains affiliate links, which means I may earn a small commission if you shop through them—at no extra cost to you. I’m partnered with Amazon, Walmart, and other brands through programs like Collective Voice and Mavely. I only share products I truly love or think you’ll find helpful.
If you love texture in your fiber arts, learning how to make a berry stitch is an absolute must. This stitch creates a thick, bumpy fabric with incredible weight and drape. It is the exact textured pattern I used to design the Easy 1-Piece Garden Fairy Berry Stitch Crochet Skirt Pattern, and it is perfect for blankets, scarves, or heavy winter garments.
If you have been looking for a berry stitch crochet tutorial for beginners, this breakdown will help you master the tension and loop sequence without getting frustrated.
Below, you can watch my quick video demonstration, or follow the detailed photo breakdown to learn this beautiful, textured crochet stitch.
Watch the Quick Video Tutorial
For a fast visual loop of the stitch sequence, check out this quick tutorial:
Berry Stitch Step by Step Instructions
Before you begin, note your stitch multiples. To practice a swatch of this crochet berry stitch tutorial, chain any even number of stitches + 1 for your foundation row (for example: chain 21).
Here is exactly how to work the sequence:
- Single crochet into the next stitch.
- Yarn over.
- Insert hook into the next stitch.
- Yarn over.
- Pull up a loop (3 loops on hook).
- Yarn over.
- Pull through FIRST LOOP ONLY (3 loops on hook).
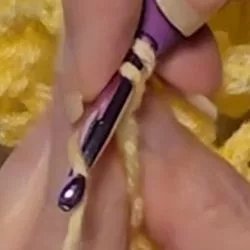
- Yarn over (4 loops on hook).
- Insert hook into the SAME stitch.
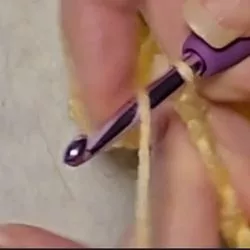
- Yarn over.
- Pull up a loop (5 loops on hook).
- Yarn over.
- Pull through all 5 loops on the hook.
- Single crochet in the next stitch to anchor and secure the berry bump.
Tip: Keep your tension relaxed on the yarn overs so your hook glides smoothly through all 5 loops on the final pull-through.
How to Make a Berry Stitch
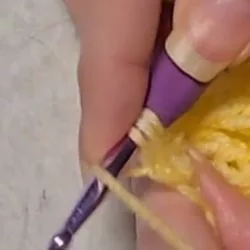
Start with a Single Crochet
Single crochet into the next stitch
Yarn Over to Begin
Yarn over.
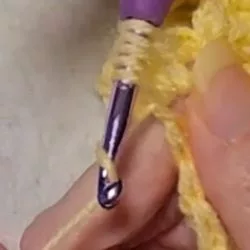
Insert Hook into the Next Stitch
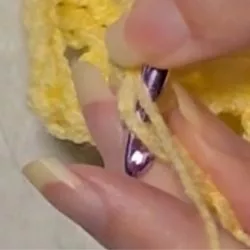
Insert hook into the next stitch.
Yarn Over

Yarn over .
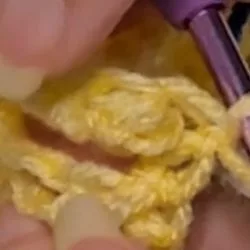
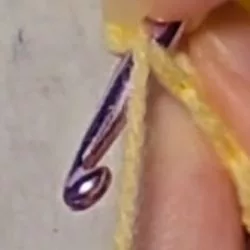
Pull Up Your First Loop
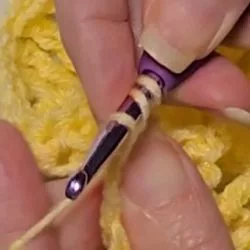
A purple crochet hook pulling up a loop of bright orange yarn to show three loops on the hook.
Yarn Over Again
Yarn over .
Pull Through First Loop
Pull through FIRST LOOP ONLY (3 loops on hook).
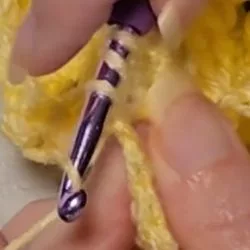
Yarn Over (4 Loops)
Yarn over (4 loops on hook).
Insert into Same Stitch
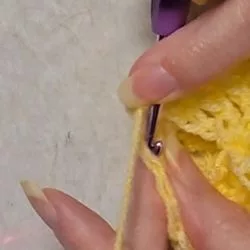
Insert hook into the SAME stitch .
Yarn Over
Yarn over .
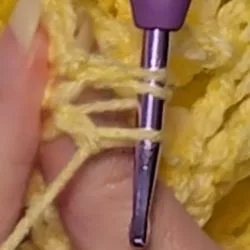
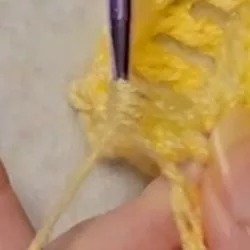
Pull Up Loop (5 Loops)
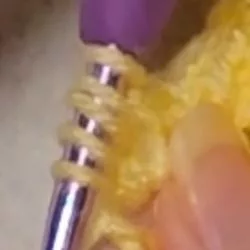
Pull up a loop (5 loops on hook).
Yarn Over
Yarn over .
Complete the Berry
Pull through all 5 loops on the hook.
Secure the Stitch
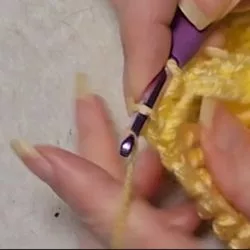
Single crochet in the next stitch to anchor and secure the berry bump.
Repeat the Pattern
Repeat these steps for each berry stitch in your row to create a textured fabric.
How to Style and Use the Berry Stitch
Once you master how to crochet berry stitch sequences, you can apply them to almost anything. Because the bumps only show up on one side of the fabric, it creates a completely smooth interior—which is why it works beautifully for wearable garments.
If you are ready to put your new skills to the test on a full project, head over to my free Garden Fairy Berry Stitch Skirt Pattern and start stitching your own tiered fairy skirt today!
Master the Texture
Learning how to make a berry stitch is one of the easiest ways to bring a rich, tactile element to your crochet work. While the multi-loop sequence might feel a bit slow at first, your muscle memory will quickly take over once you find your rhythm. Just remember to keep your tension loose on those yarn overs so your hook glides effortlessly through the final loops.
Now that you have the foundation down, it is time to put your new skills to use! Grab your favorite yarn and give it a try on a small practice swatch, or jump straight into a full garment project.
Did you find this tutorial helpful? Let me know in the comments below, and don’t forget to tag me on Instagram or Pinterest so I can see your beautiful, textured stitches in action!
📌Pin It
This post contains affiliate links, which means I may earn a small commission if you shop through them—at no extra cost to you. I’m partnered with Amazon, Walmart, and other brands through programs like Collective Voice and Mavely. I only share products I truly love or think you’ll find helpful.
Facebook Comments