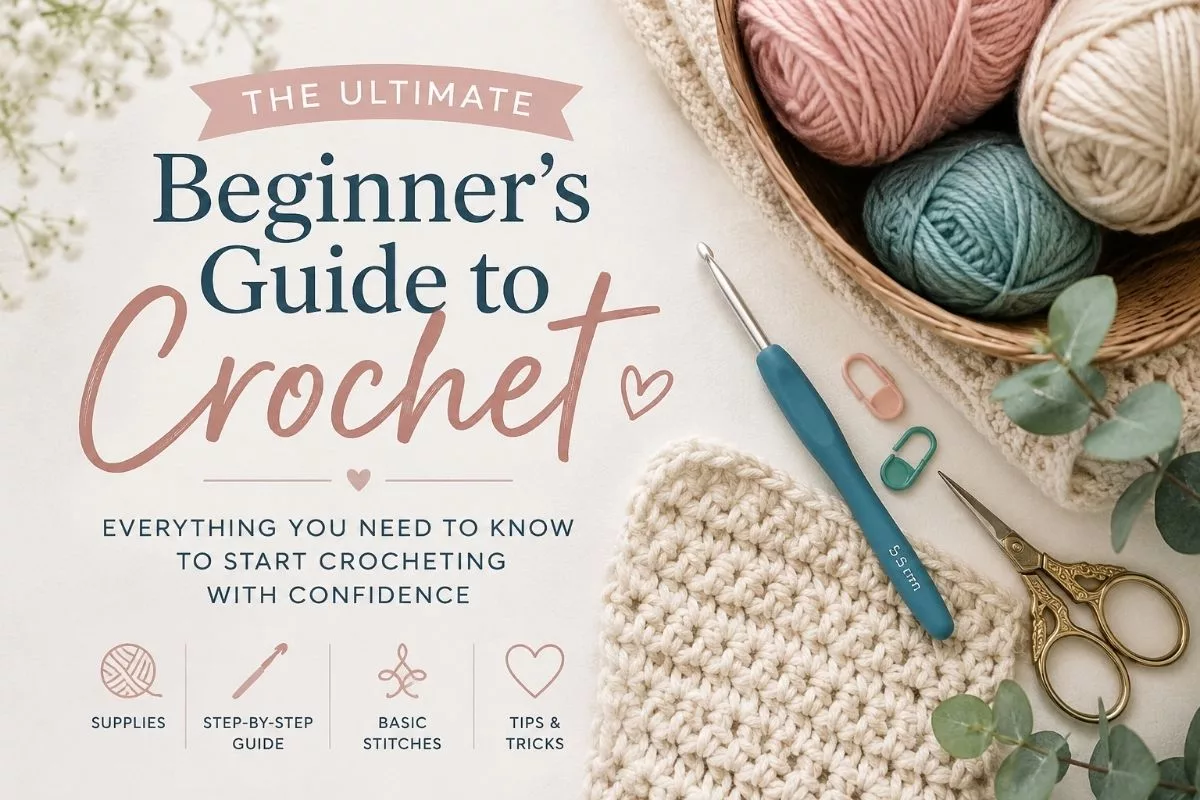
The Ultimate Guide to Crochet for Beginners
Table of Contents
Everything You Need to Know to Start Crocheting with Confidence
There’s something almost magical about crochet.
A single strand of yarn slowly transforms into fabric beneath your hands — soft blankets, cozy scarves, whimsical garments, delicate lace, cottagecore cardigans, heirloom pieces, and handmade gifts stitched one loop at a time.
And unlike many crafts that require expensive tools or complicated setup, crochet is wonderfully accessible. You only need a hook, some yarn, and a willingness to practice imperfectly for a little while.
If you’ve ever wanted to learn crochet but felt overwhelmed by all the abbreviations, techniques, or tutorials online, this guide is for you.
This is a complete beginner-friendly crochet guide designed to walk you through:
- what crochet actually is
- the supplies you need
- how to hold your hook and yarn
- foundational stitches
- common mistakes
- beginner terminology
- how to read patterns
- how to improve your tension
- and what to crochet first
Whether your goal is to make cozy blankets, wearable crochet clothing, cottagecore accessories, plushies, or relaxing mindful projects, this guide will help you build a strong foundation from the very beginning.
What Is Crochet?
Crochet is a fiber craft that uses a single hook to pull loops of yarn through one another to create fabric. Unlike knitting, crochet works with only one active stitch at a time, which makes it easier for many beginners to learn and significantly easier to fix mistakes.
Crochet can be used to create:
- blankets
- sweaters
- cardigans
- stuffed animals (amigurumi)
- lace
- home décor
- hats
- scarves
- bags
- skirts
- tops
- shawls
- pillows
- wall hangings
- and even intricate wearable art
One of the reasons crochet has become so popular again is because it blends creativity with comfort. Many crocheters find the repetitive motion calming, grounding, and deeply soothing — almost meditative once your hands learn the rhythm.
It’s also an incredibly adaptable craft:
- you can crochet slowly while watching television
- work on portable projects during travel
- create custom-fit garments
- use crochet for mindfulness and stress relief
- or build an entire handmade wardrobe over time
There is no “perfect” crochet style. Every crocheter develops their own rhythm, tension, preferences, and techniques.
And honestly? That’s part of the beauty of it.
Why Crochet Is Easier Than Many Beginners Expect
A lot of people assume crochet is difficult because patterns can look intimidating at first glance.
But the reality is:
Most crochet projects are built from just a handful of basic stitches repeated in different ways.
Once you learn:
- how to hold your yarn
- how to make a chain
- and how to create a few foundational stitches
…you can already begin making real projects.
Another reason crochet is beginner-friendly is because mistakes are relatively forgiving.
If something goes wrong, you can simply pull out the stitches and try again — a process crocheters lovingly call “frogging” because you “rip-it, rip-it” back.
That flexibility makes crochet feel much less stressful than many other fiber arts.
“Crochet is more than just loops and yarn; it is the art of slow creation. Every masterpiece starts with the same simple stitches found in this guide to crochet for beginners.”
Angel Livingston
Crochet Supplies for Beginners
One of the best things about crochet is that you do not need an expensive craft room full of supplies to begin.
In fact, beginners only need a few basic tools.
Essential Crochet Supplies
1. Yarn
Yarn is the foundation of every crochet project, and choosing beginner-friendly yarn can dramatically improve your learning experience.
For beginners, the best choice is usually:
- worsted weight (#4) yarn
- smooth texture
- solid light color
- acrylic fiber
Why Light-Colored Yarn Matters
Dark yarn makes it difficult to see your stitches clearly. While black yarn can look beautiful in finished projects, it is notoriously frustrating for beginners.
Light colors allow you to:
- identify stitches more easily
- count rows accurately
- understand stitch structure
- spot mistakes faster
Cream, beige, dusty blue, sage green, soft gray, and muted pastels are all excellent beginner choices.
Why Acrylic Yarn Is Great for Beginners
Many experienced crocheters eventually branch into cotton, wool, alpaca, bamboo, or luxury fibers — but acrylic remains one of the best beginner materials because it is:
- affordable
- durable
- widely available
- easy to unravel
- low maintenance
When you’re learning, you will likely undo and redo stitches many times. Acrylic yarn handles that process well without fraying excessively.
Understanding Yarn Weights
One of the most confusing things for new crocheters is yarn sizing.
Yarn weights do not refer to physical heaviness — they describe yarn thickness.
Common Yarn Weights
| Yarn Weight | Description | Beginner Friendly? |
|---|---|---|
| Lace (0) | Very thin delicate yarn | No |
| Fingering (1) | Sock-weight yarn | Difficult |
| Sport (2) | Lightweight yarn | Moderate |
| DK (3) | Medium-light yarn | Moderate |
| Worsted (4) | Medium yarn | YES |
| Bulky (5) | Thick yarn | YES |
| Super Bulky (6) | Very thick yarn | Sometimes |
Worsted and bulky yarns are easiest because:
- stitches are easier to see
- projects work up faster
- tension is easier to manage
- fabric structure is more visible
Choosing the Right Crochet Hook
The crochet hook you use can significantly affect your comfort and stitch consistency.
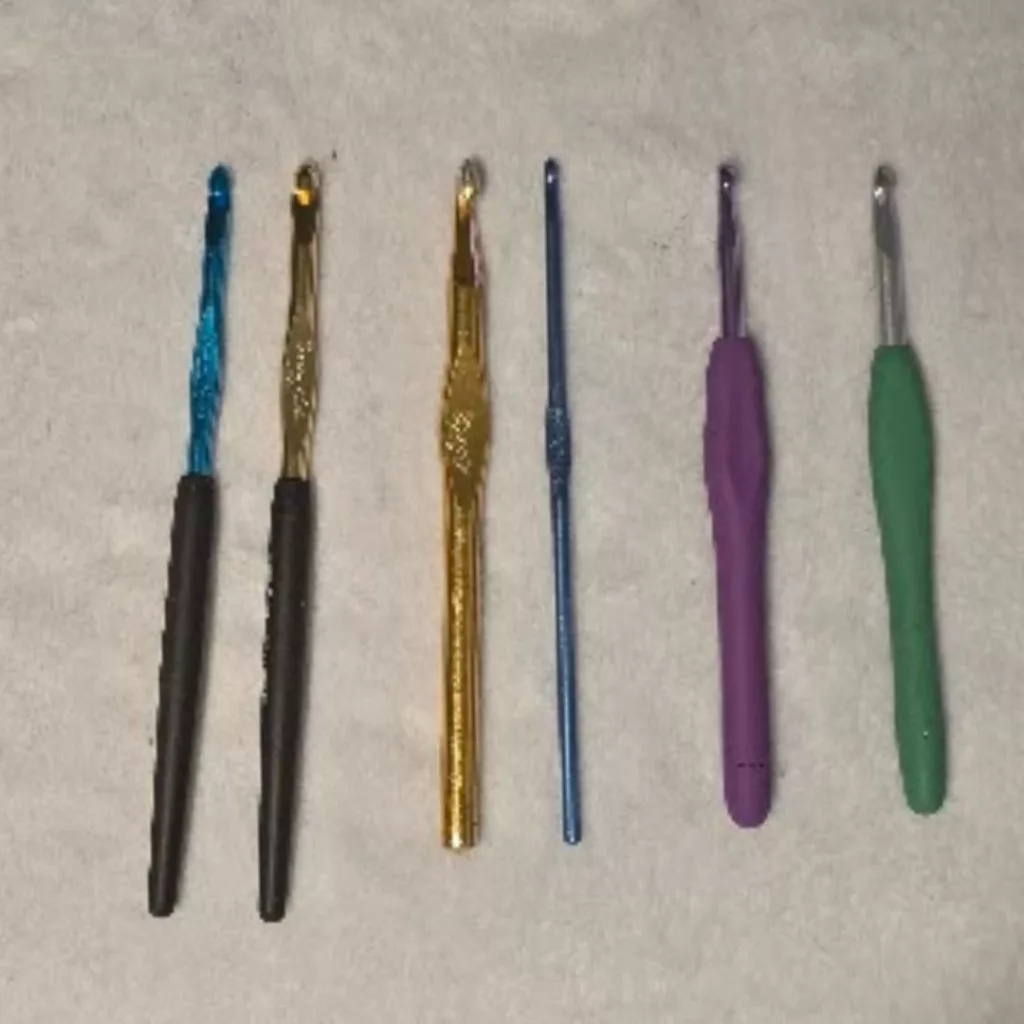
Best Crochet Hook for Beginners
A 5.0mm (H-8) or 5.5mm (I-9) hook is ideal for most beginners because it pairs well with worsted-weight yarn.
Types of Crochet Hooks
Aluminum Hooks
These are the most common beginner hooks because:
- yarn glides smoothly
- they are inexpensive
- they are durable
- they come in many sizes
Ergonomic Hooks
Ergonomic hooks have soft grips designed to reduce hand fatigue.
These are especially helpful if:
- you experience wrist pain
- you crochet for long periods
- you have arthritis
- you struggle with hand fatigue
Wooden Hooks
Wooden hooks create more friction and can feel slower for beginners, though some crocheters love the warmth and grip.
Tapered vs. Inline Crochet Hooks: Choosing Your Tool
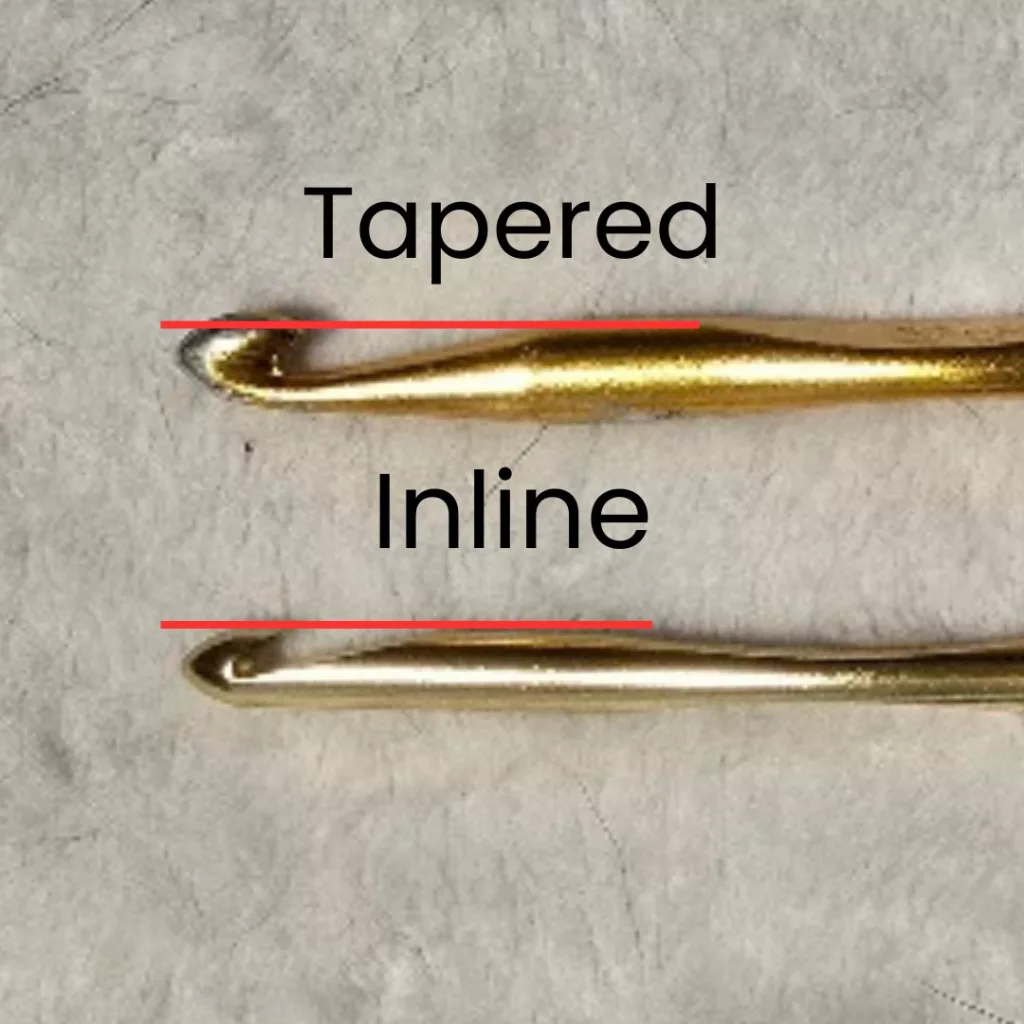
The shape of a crochet hook’s head and throat significantly impacts how the yarn slides and how your hands feel after a long session. While both get the job done, the mechanical differences change the rhythm of your stitches.
| Feature | Tapered Hooks | Inline Hooks |
| Head Shape | Rounded and small | Pointed and flat |
| Throat | Slanted or “tapered” | Straight and “inline” with the shaft |
| Grip on Yarn | Shallower; yarn slides easily | Deeper; catches yarn securely |
| Stitch Consistency | Requires more focus on tension | Naturally consistent stitch size |
| Example Brands | Boye, Clover Amour | Susan Bates, Chiaogoo |
Angel’s Choice: The All-in-One Starter Kit – After 40 years of crocheting, I’m often asked where to start without breaking the bank. I recommend the Yarniss Crochet Starter Kit. It includes a range of ergonomic hooks which are vital for preventing hand fatigue, and the 840 yards of acrylic yarn come in bright colors that make it much easier to see your stitches as you learn.
Angel Livingston
Additional Crochet Tools You’ll Eventually Want
While not mandatory at first, these tools become incredibly helpful:
Stitch Markers
These help mark:
- row beginnings
- stitch counts
- increases/decreases
- pattern repeats
They are especially useful for beginners who frequently lose track of stitches.
Tapestry Needle
Used for weaving in yarn ends after finishing projects.
Small Scissors
Tiny embroidery scissors or yarn snips work perfectly.
Measuring Tape
Essential for wearable crochet projects.
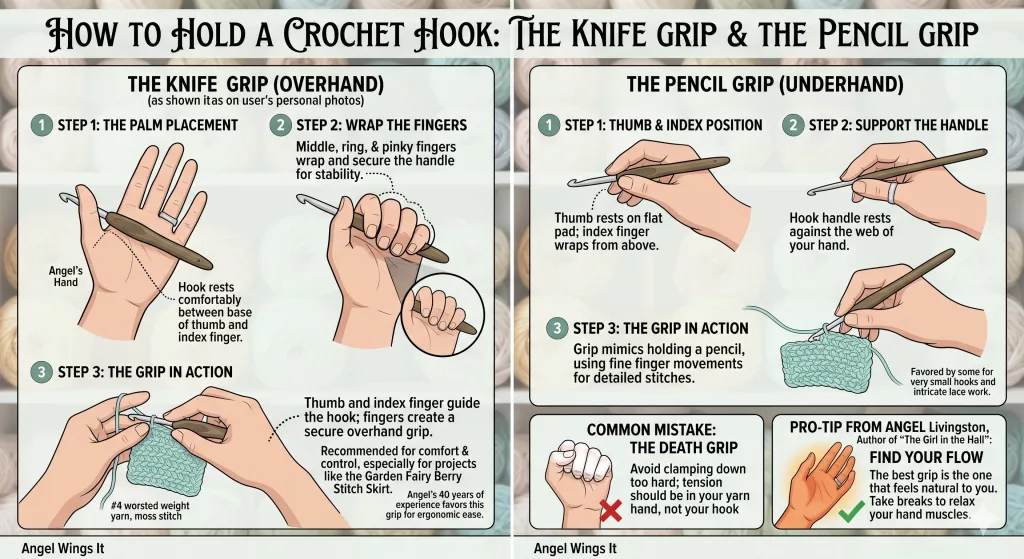
How to Hold a Crochet Hook
There is no universal “correct” way to hold your crochet hook.
The goal is comfort and control.
Pencil Grip
The hook is held similarly to a pencil.
Many crocheters feel this provides:
- precise control
- delicate movement
- smoother wrist motion
Knife Grip
The hook is held like a dinner knife with the hand resting over the top.
This method often feels:
- stronger
- more stable
- easier for tension control
Most crocheters naturally settle into whichever grip feels intuitive.
And yes — many people switch between them without realizing it.
Understanding Yarn Tension
Tension refers to how tightly or loosely you hold your yarn while crocheting.
This is one of the hardest beginner skills because it develops through muscle memory over time.
Tight Tension
If your tension is too tight:
- stitches become difficult to insert into
- your hands may hurt
- your project may curl
Loose Tension
If your tension is too loose:
- stitches become floppy
- gaps appear in the fabric
- projects lose structure
How to Improve Tension
The best way to improve tension is not through perfection — it’s through repetition.
Your first swatches will likely:
- wobble
- curve
- tighten unevenly
- contain accidental increases and decreases
That is completely normal.
Every crocheter starts there.
Crochet for Beginners Terminology Beginners Should Know
Learning crochet terminology helps patterns feel dramatically less intimidating.
Common Crochet Terms
| Abbreviation | Meaning |
|---|---|
| ch | chain |
| sc | single crochet |
| dc | double crochet |
| sl st | slip stitch |
| st | stitch |
| rep | repeat |
| yo | yarn over |
At first these abbreviations look confusing, but after a few projects they become second nature.
US vs. UK Crochet Terminology Reference
In my 40 years of experience, I’ve seen many beginners get frustrated because their project looks nothing like the photo—only to realize they were using a UK pattern with US stitches. Always check your pattern’s origin before you begin. These differences exist because the two systems describe stitches based on different logic: the US system counts the number of times you wrap yarn to create a stitch, while the UK system counts the number of loops on the hook after the first pull-through.
| US Terminology | UK Terminology | Abbreviation |
| Slip Stitch | Slip Stitch | sl st |
| Single Crochet | Double Crochet | sc / dc |
| Half Double Crochet | Half Treble Crochet | hdc / htr |
| Double Crochet | Treble Crochet | dc / tr |
| Treble Crochet | Double Treble Crochet | tr / dtr |
| Skip | Miss | sk / miss |
| Gauge | Tension | gauge / tension |
How to Make a Slip Knot
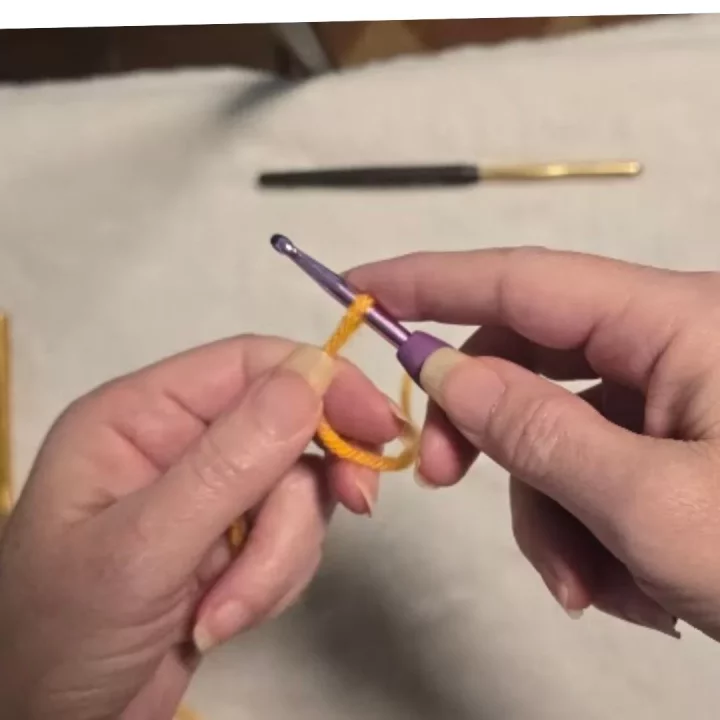
How to Make a Slip Knot
Every crochet project begins with a slip knot.
Instructions
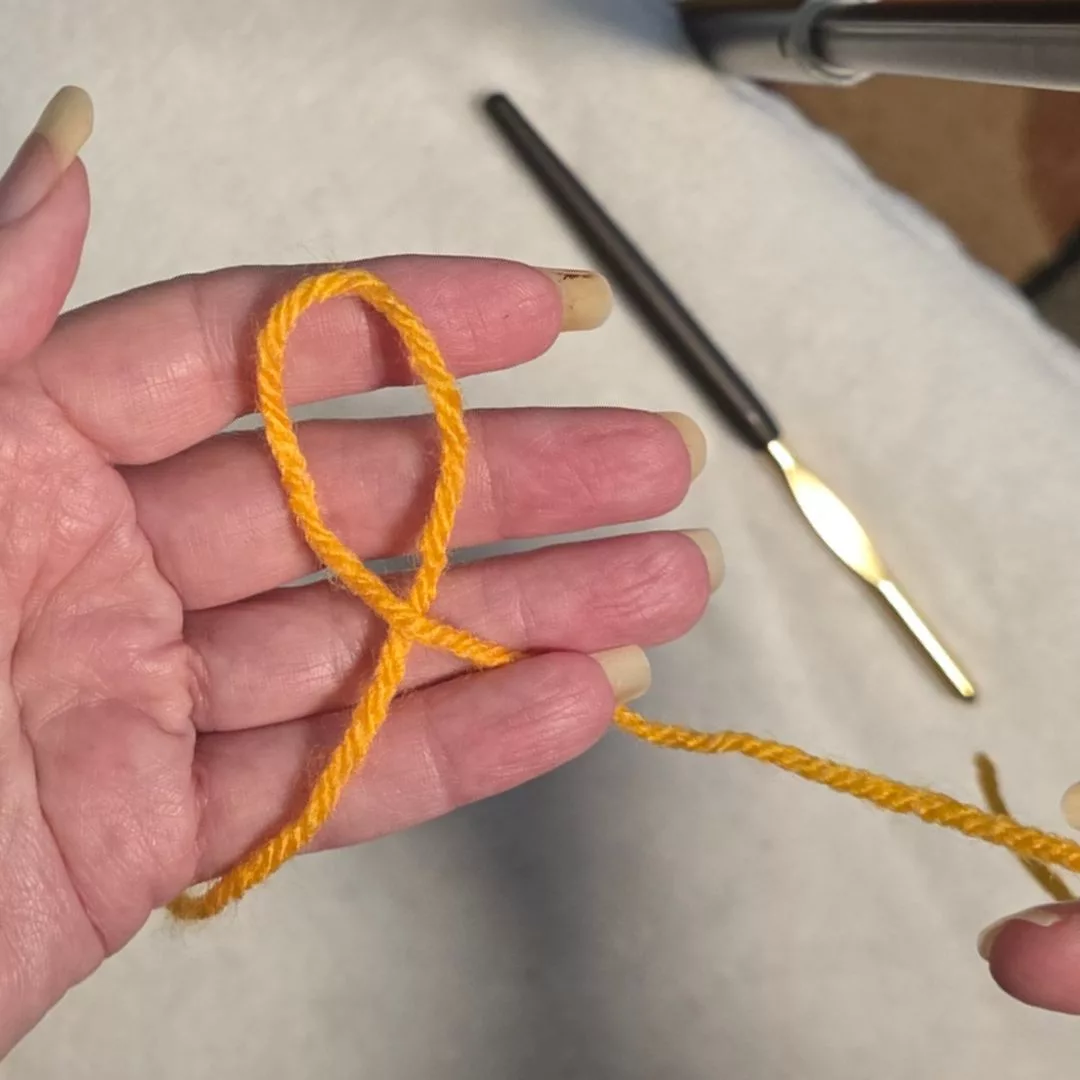 Create a loop with your yarn
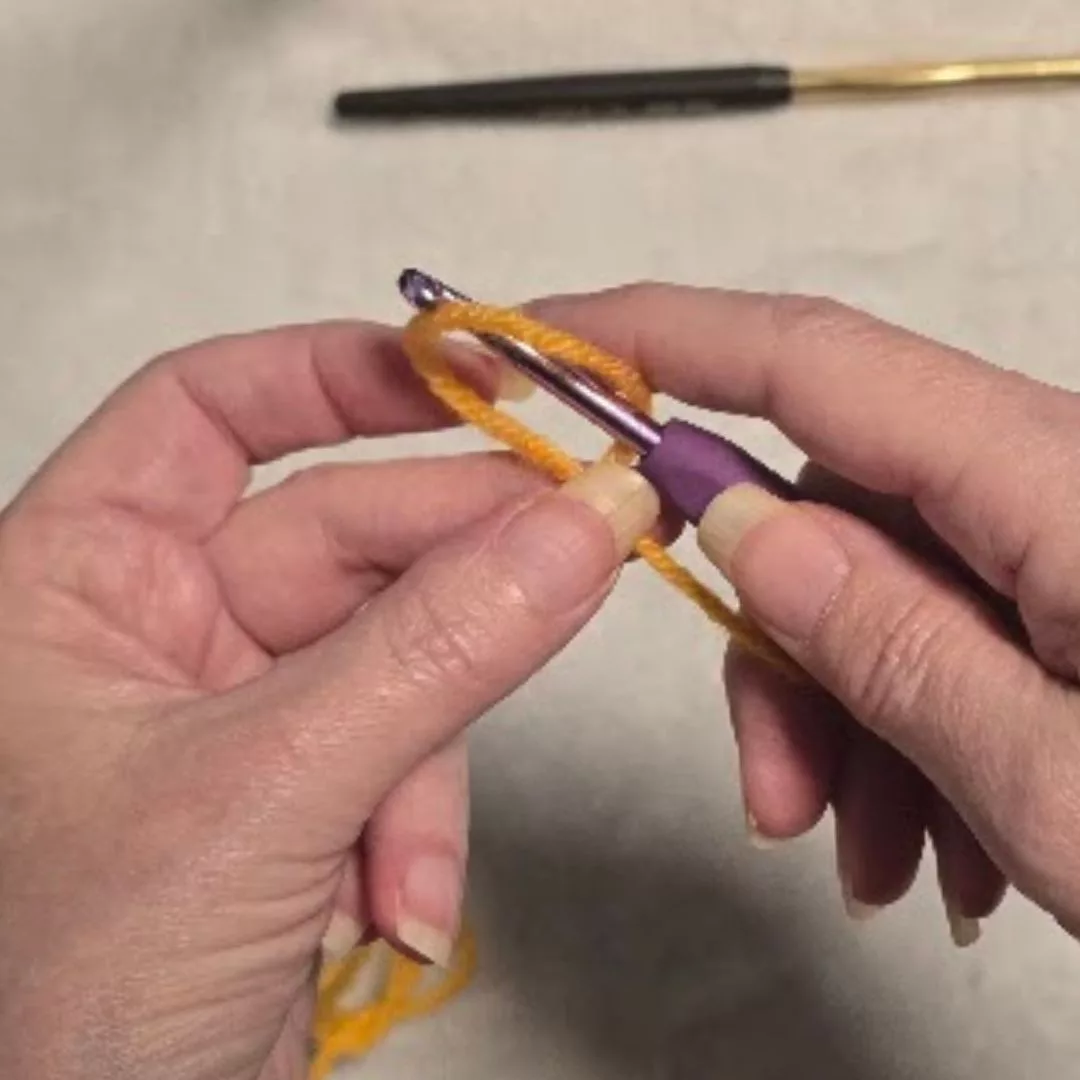 Insert the hook into the loop
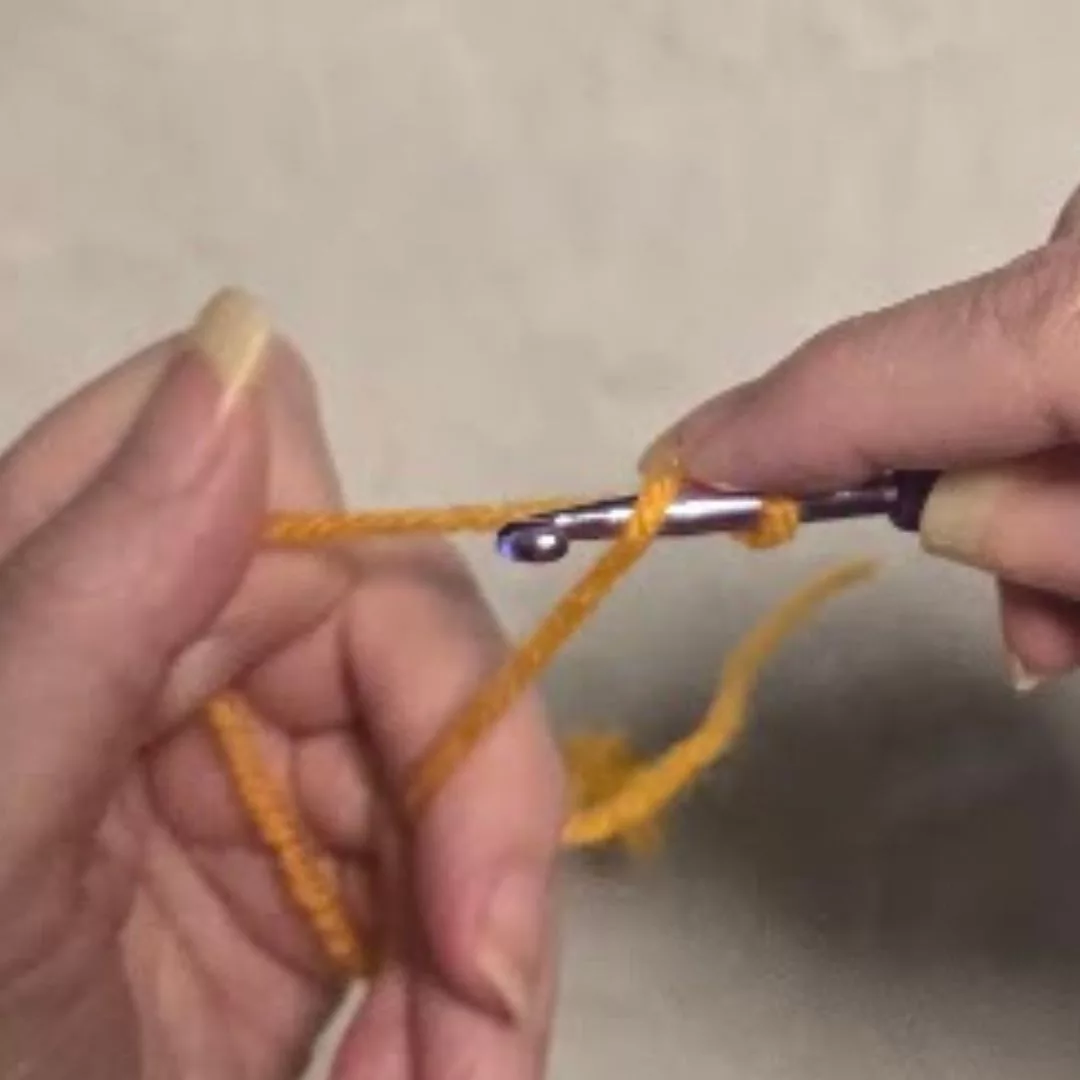 Grab the working yarn
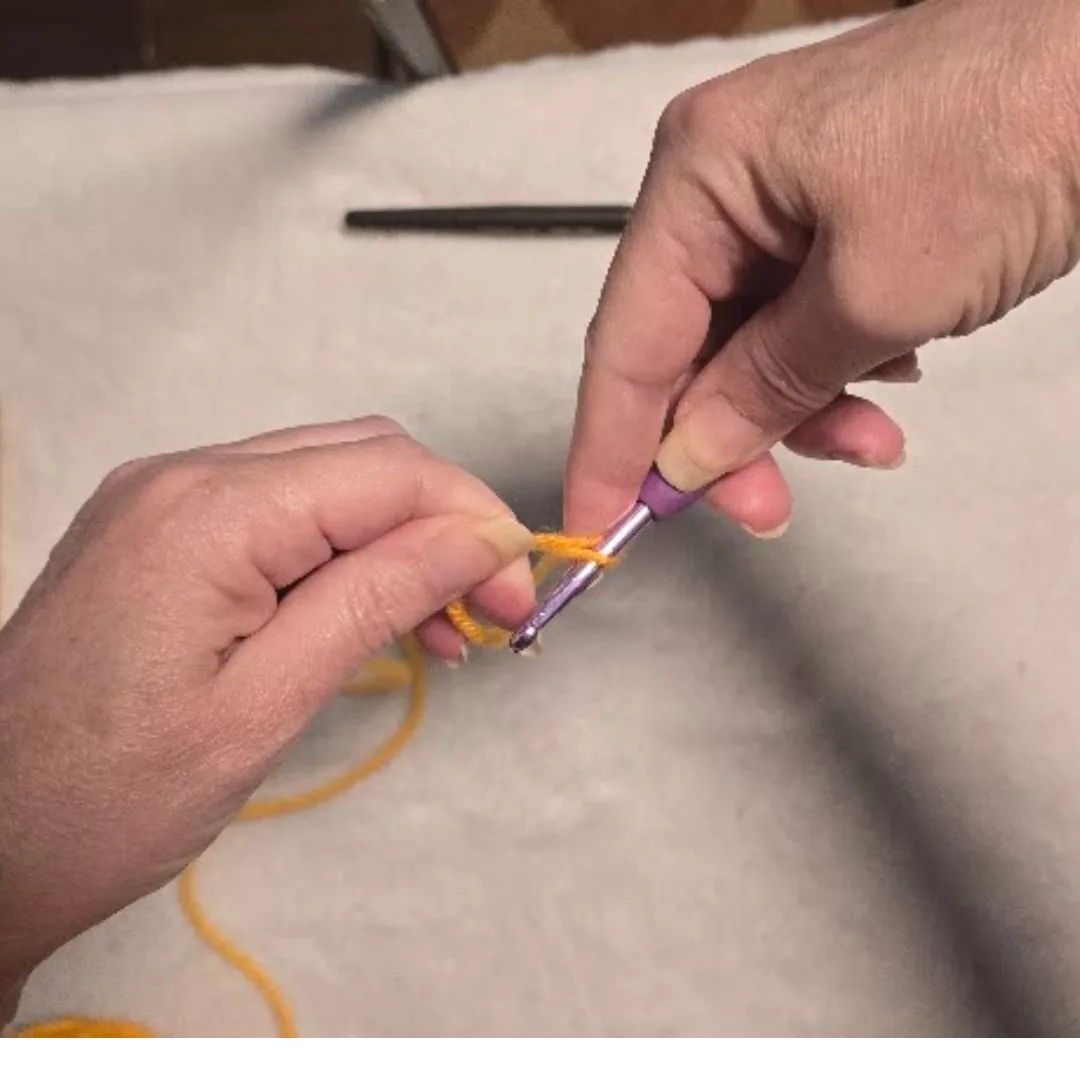 Pull it through
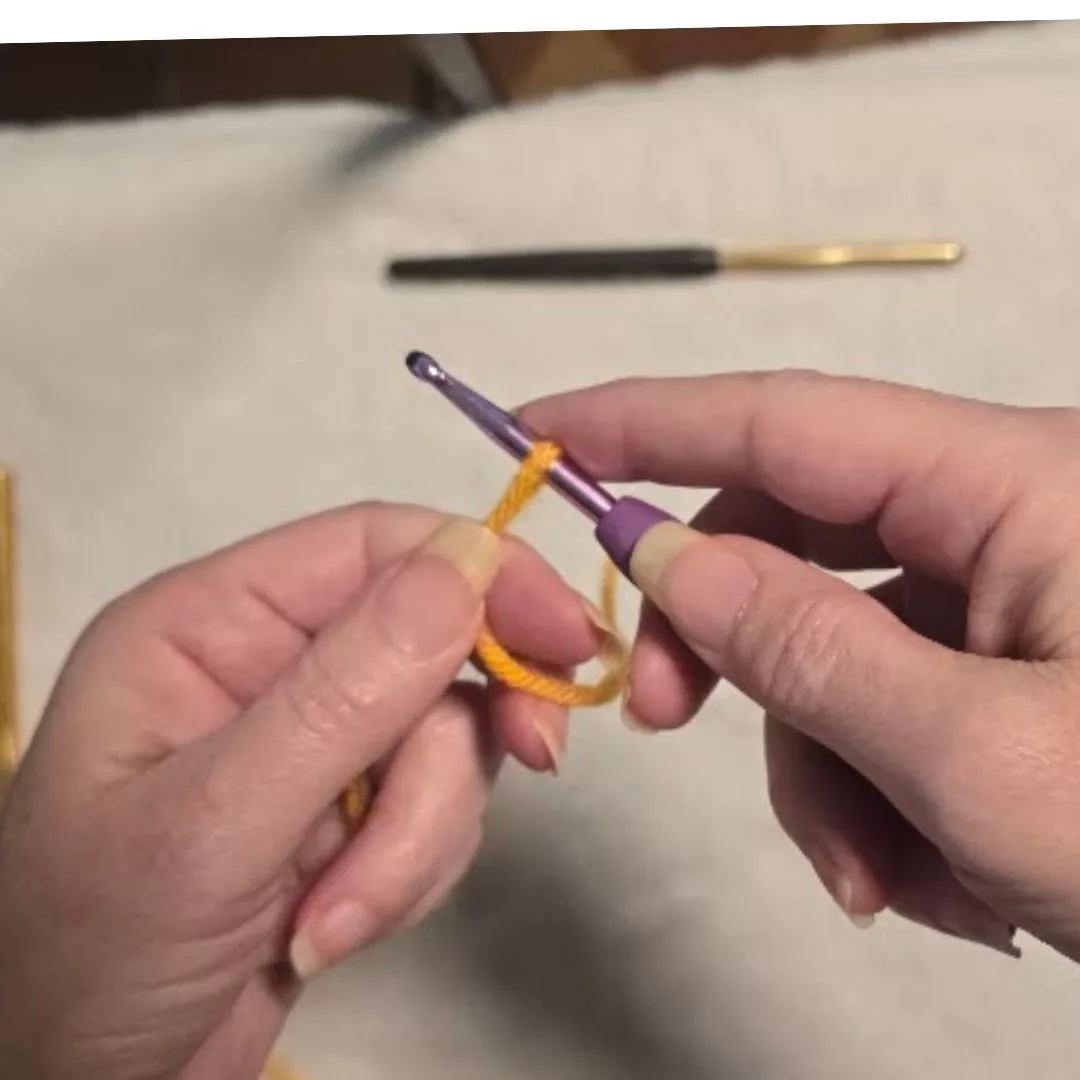 Tighten gently
Your loop should slide comfortably along the hook without being too tight.
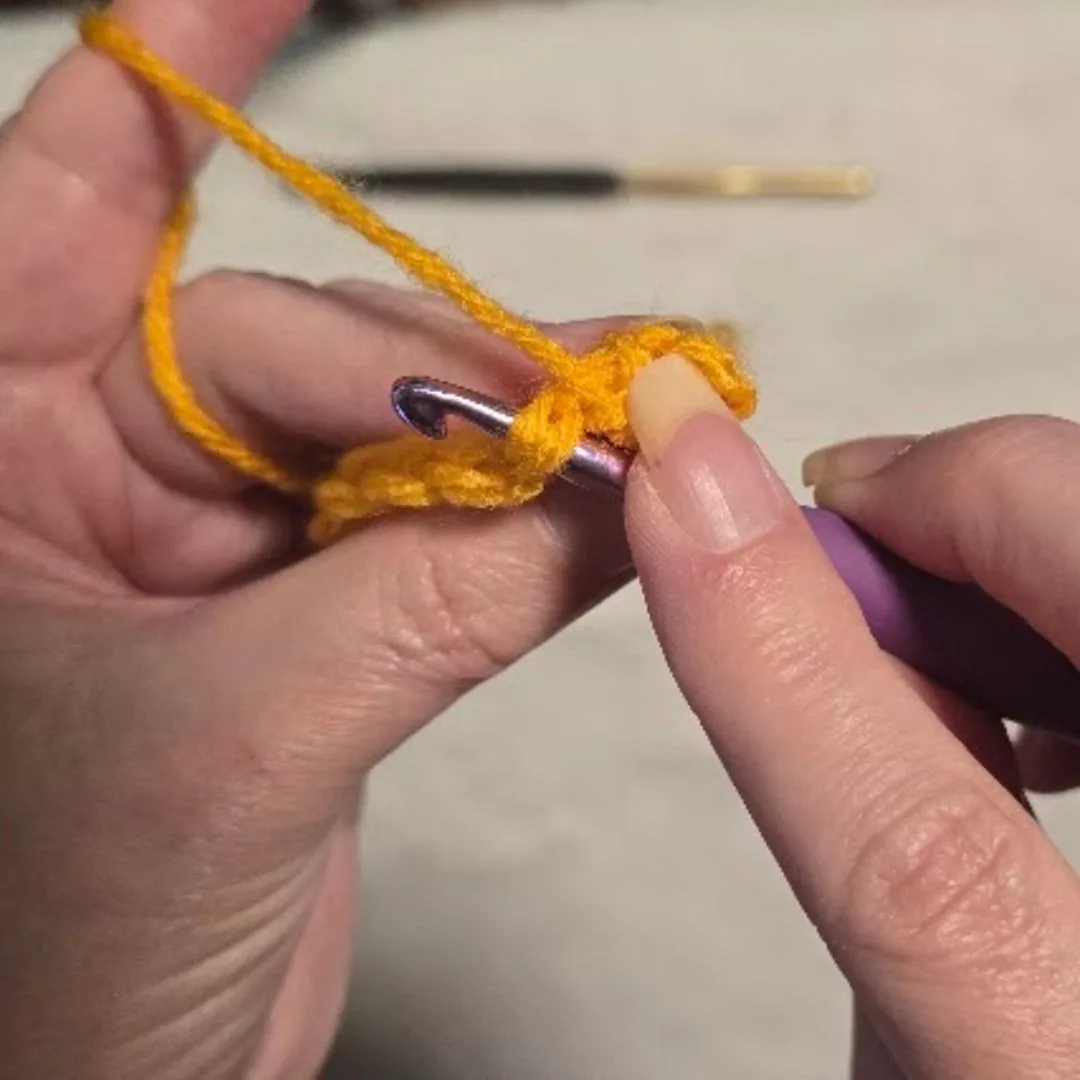
How to Make a Chain Stitch

How to make a Chain Stitch
The chain stitch forms the foundation row of many crochet projects.
Instructions
 Slip Stitch on Hook
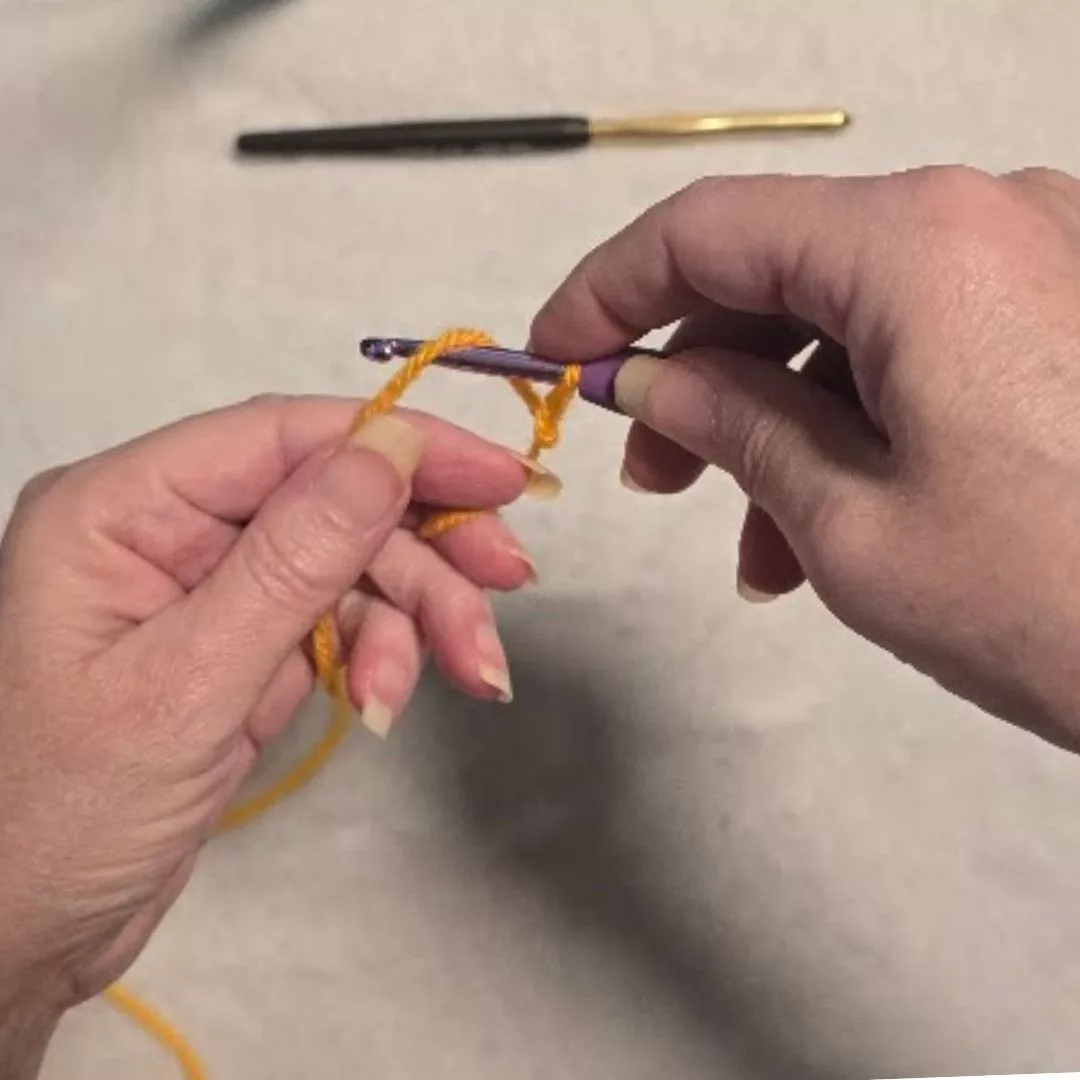 Yarn Over
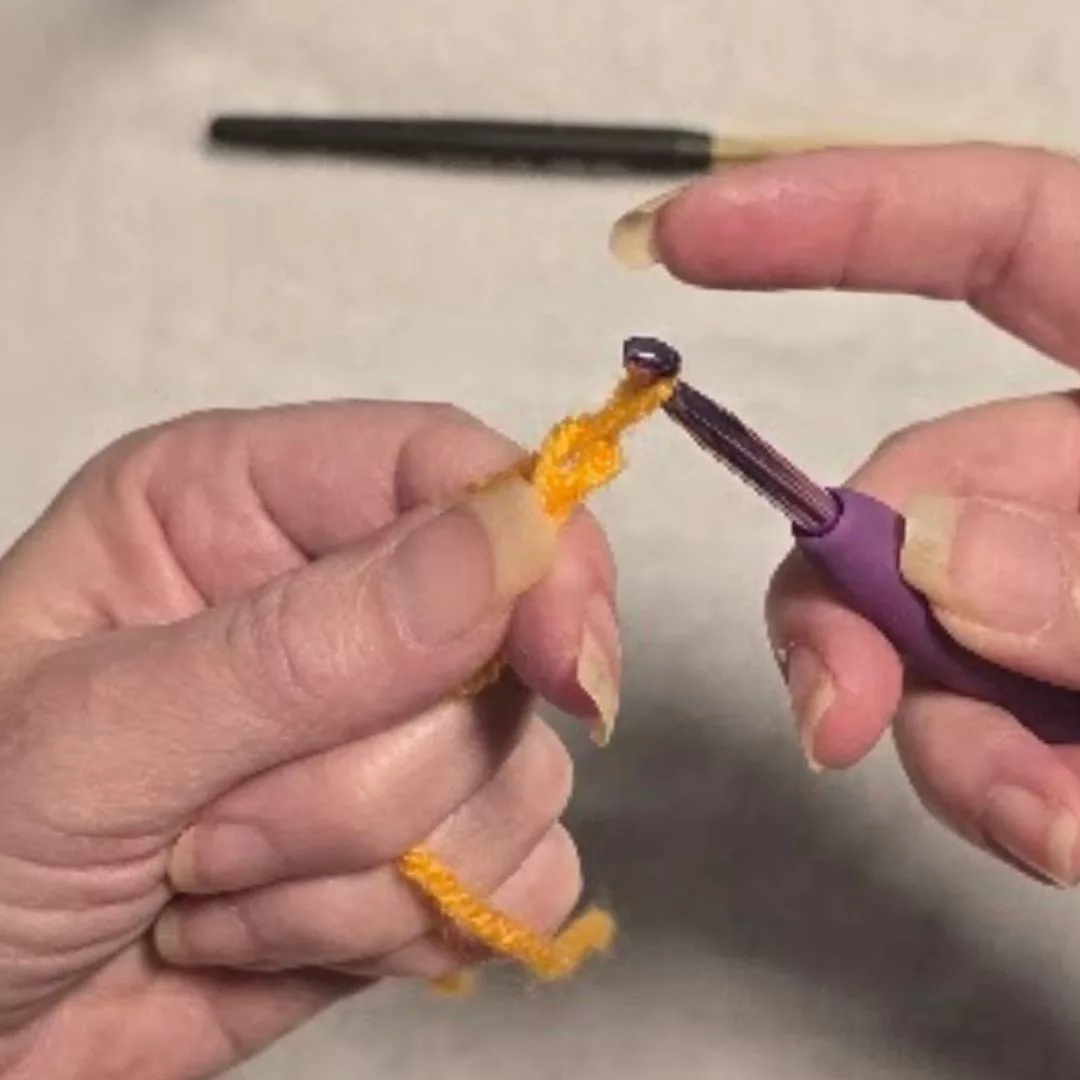 Pull through the loop on your hook
Repeat.
That’s it.
And yes — every crocheter once sat making endless slightly-wonky chains while learning too.
Why Beginner Crochet Chains Often Feel Difficult
Foundation chains are frequently tighter than the rest of the project.
This happens because beginners instinctively pull too tightly while trying to maintain control.
A few tips:
- consciously relax your shoulders
- loosen your grip
- use a larger hook temporarily for chains
- practice making chains without worrying about perfection
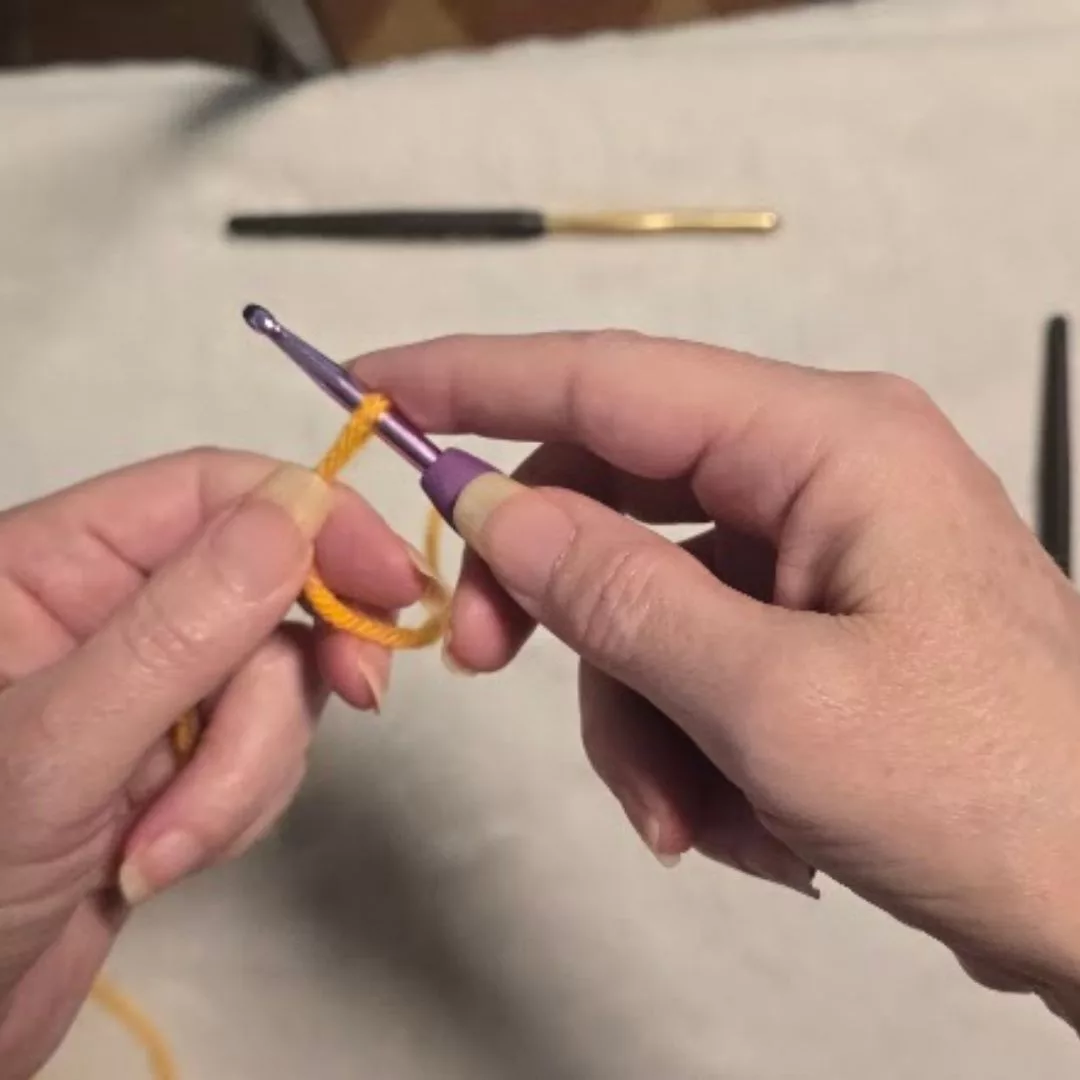
How to Single Crochet
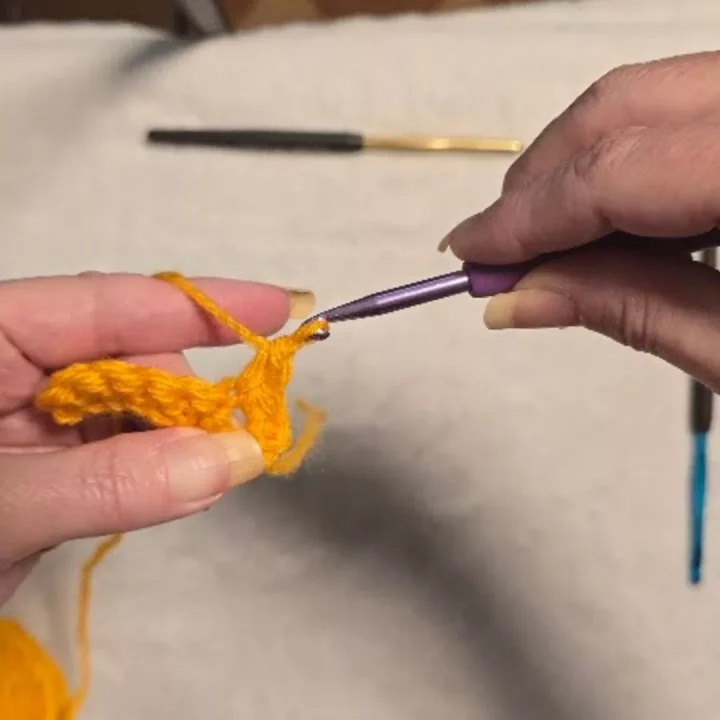
How to Single Crochet
Single crochet is one of the most foundational crochet stitches.
Instructions
 Insert hook into stitch
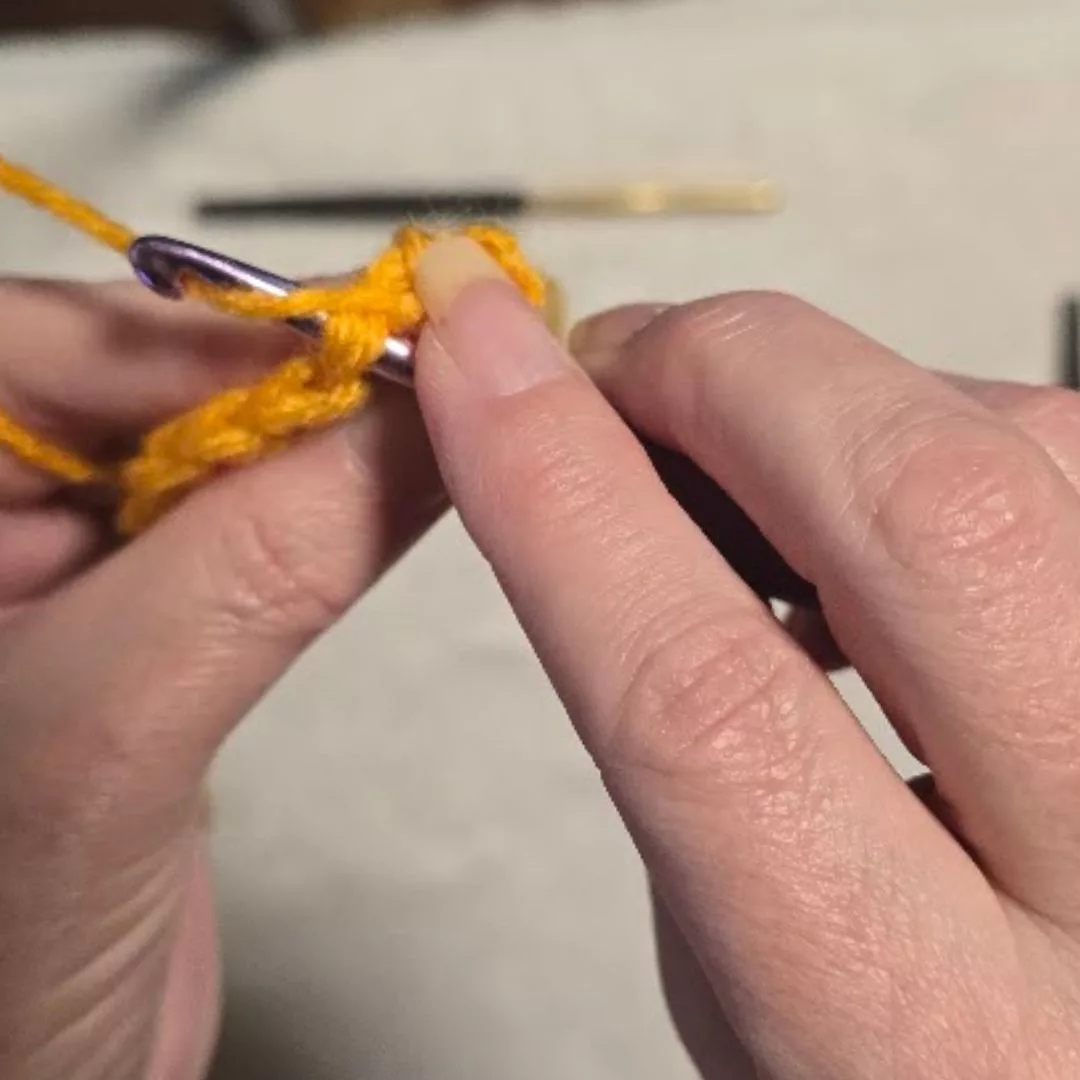 Yarn over
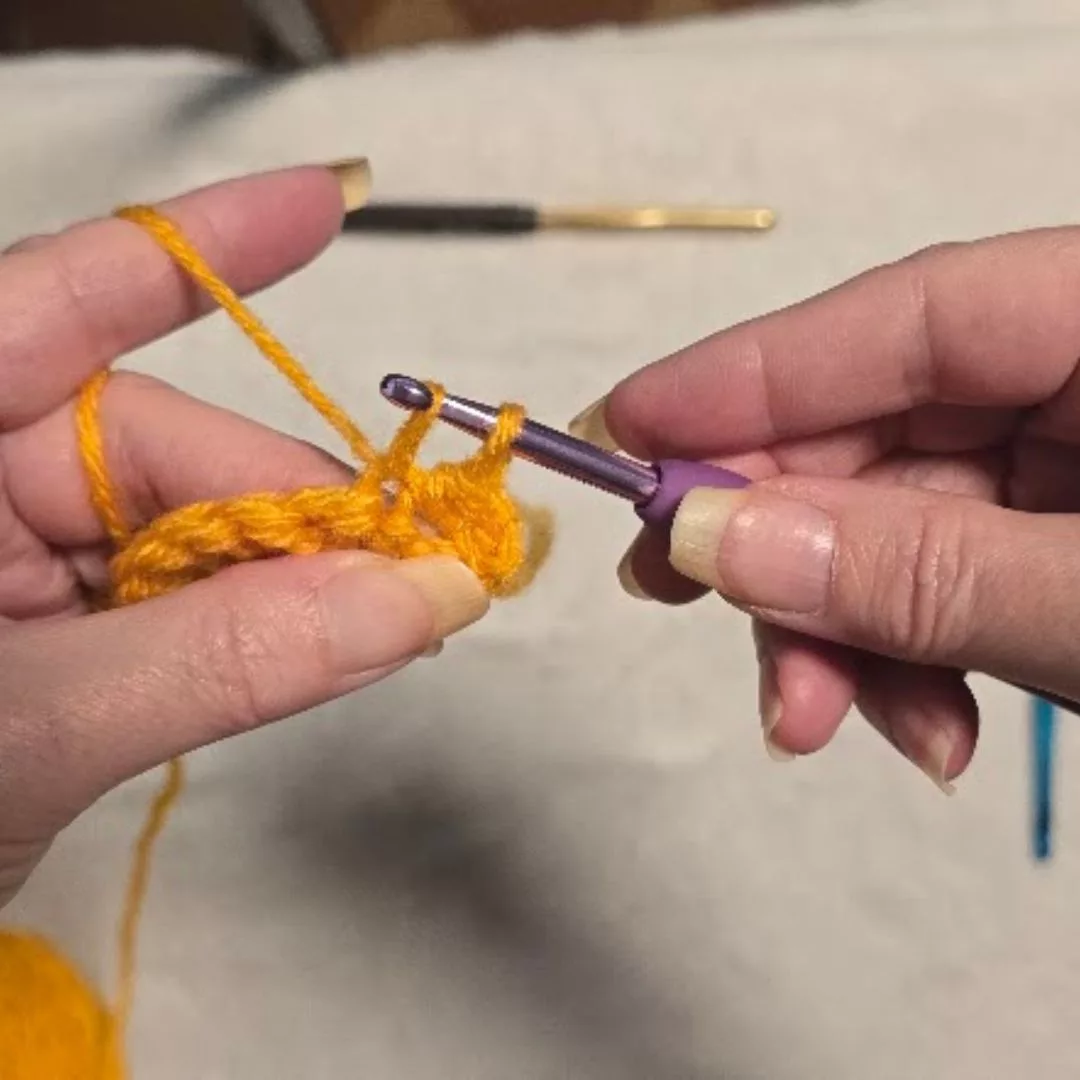 Pull up a loop
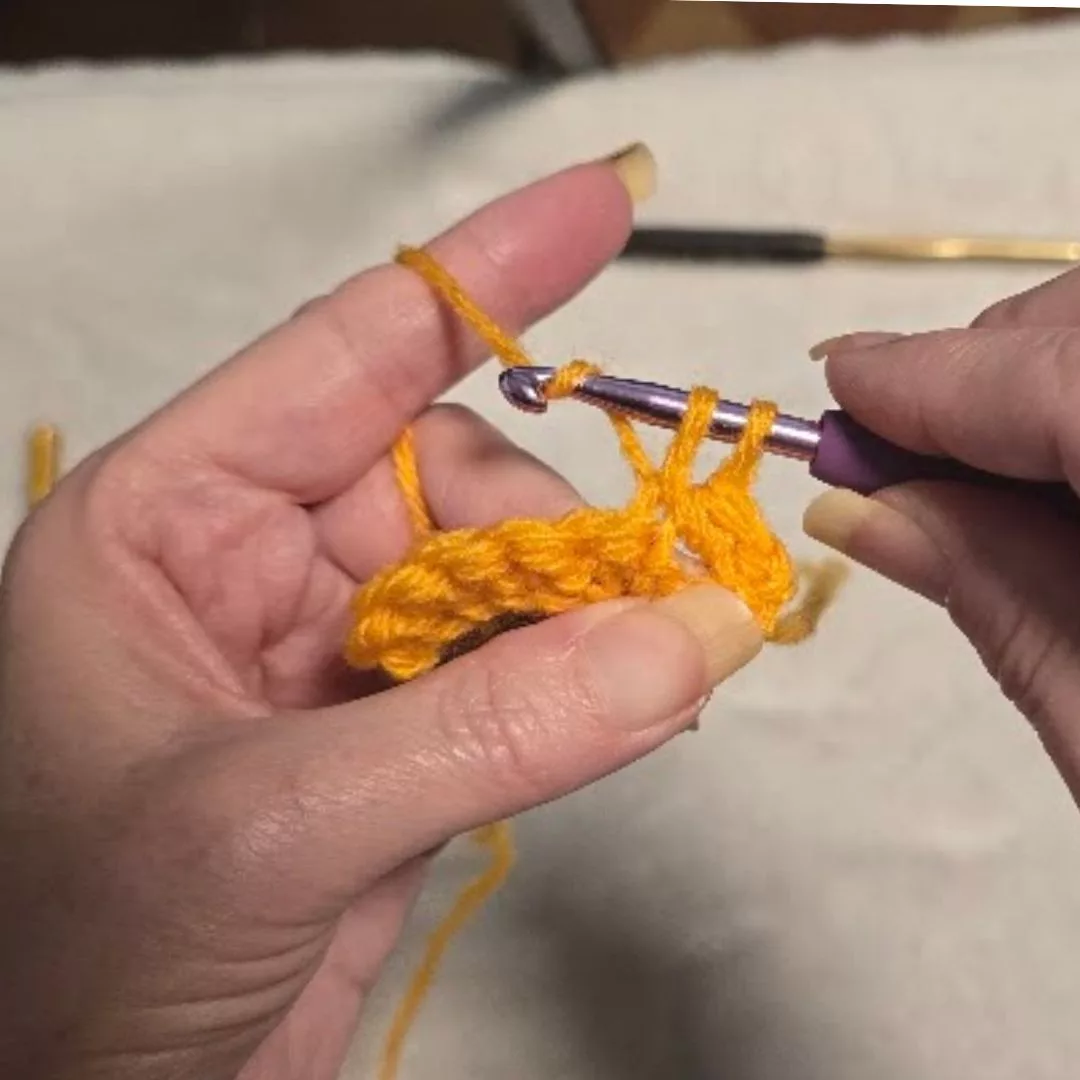 Yarn over again
 Pull through both loops
Why Single Crochet for Beginners
It creates:
- dense fabric
- minimal gaps
- structured texture
Single crochet is commonly used for:
- amigurumi
- bags
- warm garments
- baskets
- home décor
How to Turn Your Crochet Work
At the end of each row, you’ll turn your work to continue building fabric upward.
Most beginner projects involve:
- chaining one
- turning the work
- crocheting across the next row
Turning rows is where many beginners accidentally gain or lose stitches.
This is why stitch markers can be so helpful.
Common Beginner Crochet Mistakes (and How to Fix Them)
In my 40 years of fiber arts experience, I’ve found that most beginner frustrations stem from three specific technical hurdles. Addressing these early prevents the “wonky edge” syndrome common in first projects.
1. Unintentional Stitch Count Drifts
The most frequent issue for new crocheters is accidentally adding or losing stitches at the ends of rows.
- The Cause: It is easy to mistake the “turning chain” for a stitch or to skip the very last stitch of a row because it looks smaller than the others.
- The Pro Fix: Use stitch markers. Place a marker in the first and last stitch of every row. If your pattern calls for 20 single crochets, you should count exactly 20 before turning.
2. “Death Grip” Tension
Beginners often hold the yarn too tightly, which makes it nearly impossible to insert the hook back into the previous row.
- The Technical Tip: If you struggle to get your hook through a loop, you are likely pulling the yarn too tight with your non-dominant hand. Practice “yarn over” loosely; the loop should be able to slide up and down the widest part of your hook shank easily.
- Pro Example: For my Garden Fairy Berry Stitch Skirt, maintaining a relaxed tension is vital because the “berry” texture relies on consistent, soft loops to pop correctly.
3. Misidentifying the “V”
Every crochet stitch has a top that looks like a “V.” A common mistake is inserting the hook into only one half of that V (either the front loop or the back loop).
The Standard Rule: Unless a pattern specifically says “BLO” (Back Loop Only) or “FLO” (Front Loop Only), you must always insert your hook under both strands of the V. This ensures your fabric is sturdy and doesn’t have unintended gaps.
Crochet for Beginners Troubleshooting Quick-Reference
| Symptom | Likely Cause | Solution |
| Project is getting wider | Adding stitches in the turning chain | Use markers; count every row |
| Project is curling tightly | Tension is too high | Relax your grip or use a 0.5mm larger hook |
| Gaps between stitches | Tension is too loose | Hold the yarn more firmly across your fingers |
| Edges look “stair-stepped” | Skipping the first or last stitch | Count the “V”s at the top of the row before turning |
Common Crochet for Beginners Questions & Expert Answers
What is the easiest crochet stitch for a total beginner?
The single crochet (sc) is the best starting point for any beginner. It is the foundation for almost every other stitch and creates a sturdy, tight fabric. Once you master the single crochet, you can easily transition to taller stitches like the half-double and double crochet.
How do I know which hook size to use with my yarn?
You should always check the yarn label first; it will typically list a recommended hook size in millimeters (e.g., 5.0mm). If you’ve lost the label, a good rule of thumb is to use a hook that allows the yarn to sit comfortably in the “throat” of the hook without overflowing. For a standardized look at sizes, refer to the Standard Yarn Weight System.
Why is my crochet project curling at the edges?
Curling is usually caused by tension that is too tight, especially in your foundation chain. If your stitches are pulled too firmly, the fabric will contract. To fix this, try consciously relaxing your hands or switching to a hook that is 0.5mm larger than what your pattern suggests.
Is it better to learn crochet or knitting first?
While both are rewarding, many find crochet easier to learn because you only manage one “active” stitch at a time on a single hook. In knitting, you have multiple live stitches on two needles, which can be harder to recover if one is dropped. Crochet is also significantly faster for creating large items like blankets or hats.
Can I use any yarn for my first project?
Technically yes, but for the best experience, choose a medium-weight (#4) acrylic yarn in a light, solid color. Dark colors or “eyelash” yarns with lots of texture make it nearly impossible to see where your hook needs to go, which leads to frustration and skipped stitches.
Best Crochet for Beginners Projects
The best first crochet projects are simple, repetitive, and low-pressure.
Great Crochet for Beginners Projects
- dishcloths
- scarves
- simple blankets
- coasters
- granny squares
- headbands
- pillow covers
Avoid highly fitted garments or advanced lace immediately at the beginning.
Build confidence first.

How Long Does It Take to Learn Crochet for Beginners?
Most beginners can learn:
- chains within a day
- single crochet within a few practice sessions
- basic projects within a week or two
Consistency matters more than speed.
Crochet is a muscle-memory craft.
The more your hands repeat the motions, the more natural it becomes.
Final Thoughts: Learning Crochet for Beginners Slowly Is Still Learning
One of the most important things to remember is this:
You do not need to become “good” at crochet immediately.
Your first stitches may be uneven.
Your first scarf may curl.
Your first square may accidentally become a trapezoid.
That is not failure.
That is literally the process of learning crochet for beginners.
Every experienced crocheter you admire once sat exactly where you are:
- confused by tension
- frustrated by counting
- unraveling rows repeatedly
- wondering if they were doing it wrong
And then one day, their hands remembered.
Yours will too.