
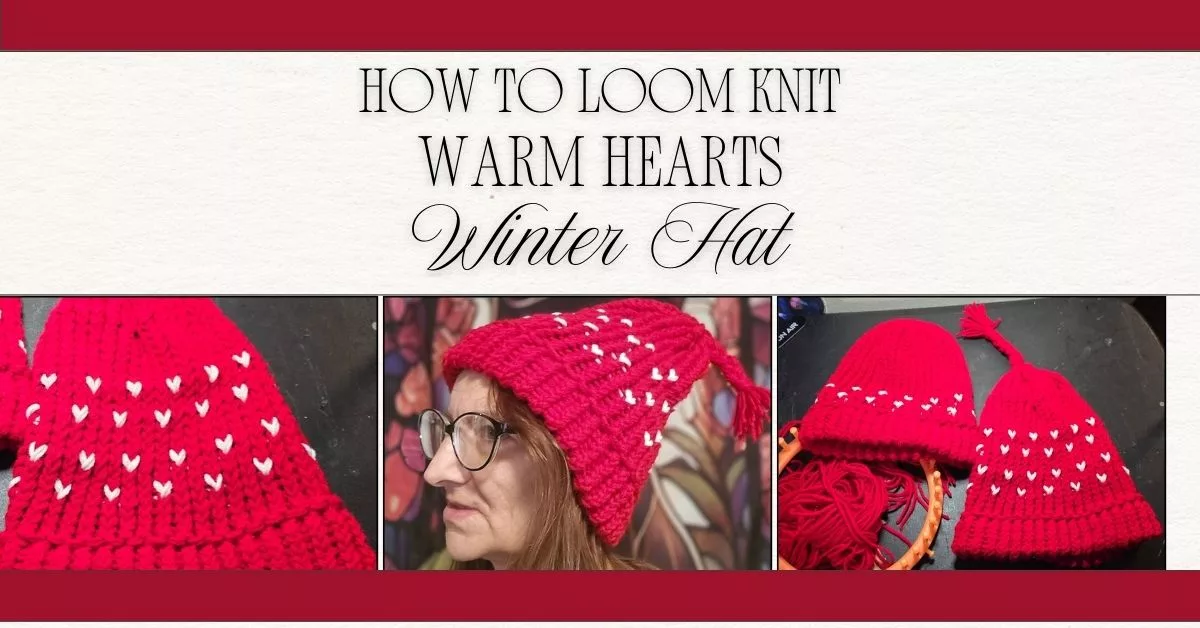
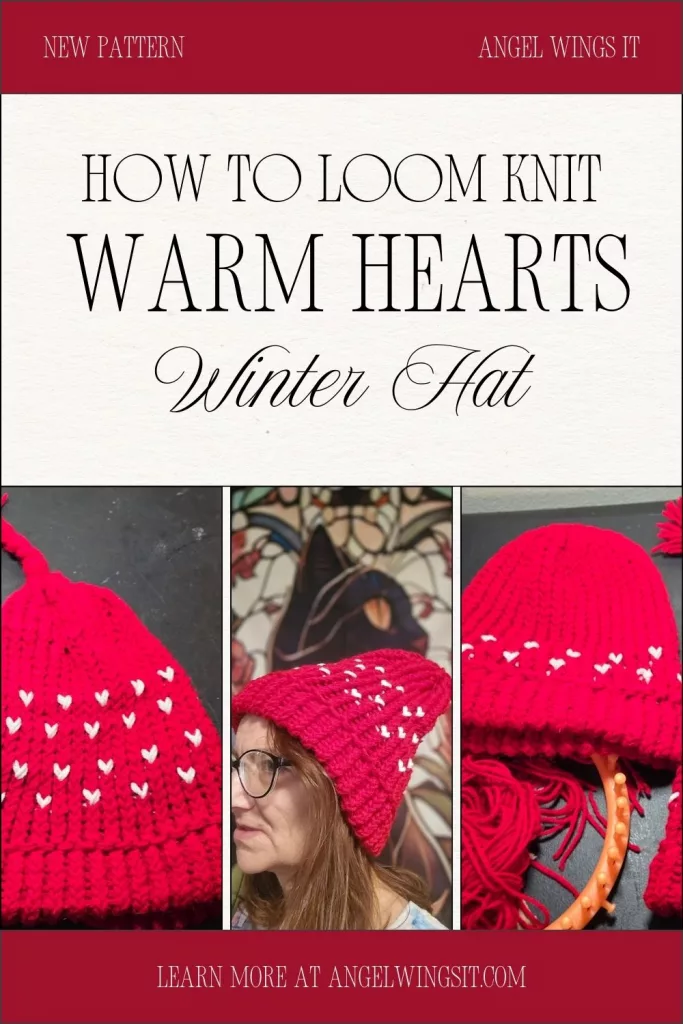
How to Loom Knit the Red Loom‑Knit Warm Hearts Hat
This post contains affiliate links, which means I may earn a small commission if you shop through them—at no extra cost to you. I’m partnered with Amazon, Walmart, and other brands through programs like Collective Voice and Mavely. I only share products I truly love or think you’ll find helpful.
A step‑by‑step tutorial with photos
The Red Loom‑Knit Warm Hearts Hat wasn’t actually the project I set out to make. I had originally pictured a soft white scarf with tiny red hearts marching neatly in two rows — but my small loom was already busy with another idea, and sometimes creativity nudges you in a different direction. So I shifted to a hat, flipped the colors, and suddenly the whole project felt warmer, cozier, and a little more joyful. The tiny hearts are my favorite part: they look delicate and intricate, but they’re wonderfully simple to work, the kind of detail that makes beginners feel like magicians. This hat became one of those comforting, steady projects that feels good in your hands from the very first wrap on the loom.
Getting Started: Tools, Yarn, and a Cozy Setup
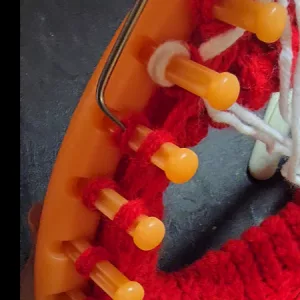
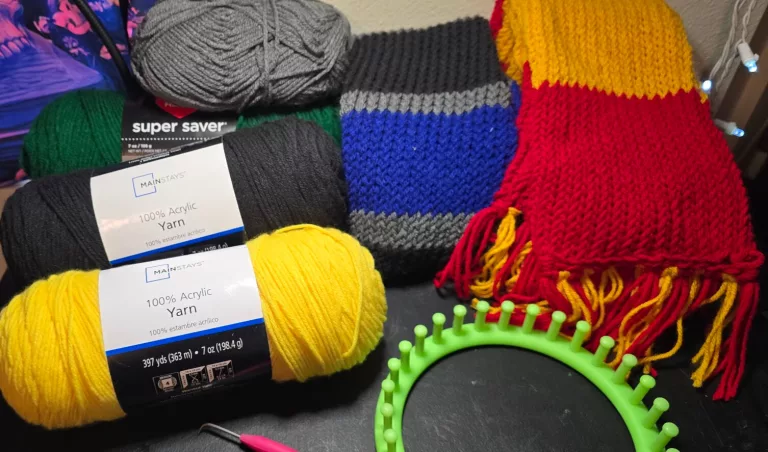
Before we jump into the stitches, let’s gather everything you’ll need for the Red Loom‑Knit Warm Hearts Hat. I’m using the orange loom from the Darice set, but truly, any 36‑peg loom with 5/8″ spacing between the pegs will give you the same results. If you need a larger or smaller hat, you can simply size your loom up or down — one of the quiet joys of loom knitting is how easily you can adapt a pattern to fit the person you’re making it for.
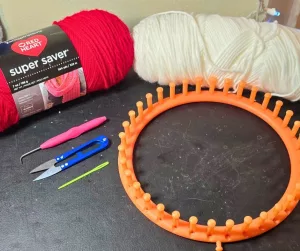
For yarn, I’m holding two strands of medium‑weight yarn together throughout the entire project. This gives the hat that soft, squishy bulk without needing specialty yarn. I like to pull one strand from the center of the skein and one from the outside, but you can also use two separate skeins or wind two strands together ahead of time. There’s no wrong way — just choose the method that feels the least fussy in your hands.
If you prefer, you can absolutely use bulky yarn instead of doubling medium weight. I had plenty of Cherry Red and White left over from earlier projects, so holding two strands together made sense for me, but bulky yarn will work beautifully too. Use what you have, what you love, and what feels good in your hands.
My main color is Red Heart Super Saver in Cherry Red, and the tiny heart accents are worked in Mainstays Medium Acrylic in White. The contrast is gentle but cheerful, and the doubled strands make the whole project feel warm and steady as you work.
This is a good moment to settle in, take a breath, and set up your space. Whether you’re following along with the video or working from the photos step by step, you’re about to make something cozy and comforting with your own hands — and that’s always a small kind of magic.
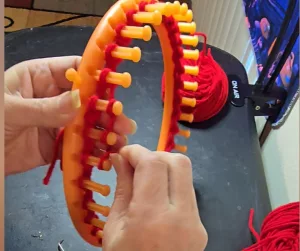
Casting On
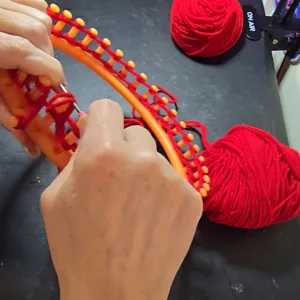
We’ll begin the Red Loom‑Knit Warm Hearts Hat with a Double E‑Wrap Cast On, which creates a stretchy, comfortable edge for the folded brim. This is one of those steps that looks a little fancy at first, but once you settle into the rhythm, it becomes soothing and almost meditative.
To start, secure your yarn to the anchor peg. You’re going to wrap each peg twice, and there are two ways to do it — choose whichever feels calmer in your hands:
- Option 1: Wrap and knit each peg individually.
- Option 2: Wrap the entire loom all the way around, then go around again to give every peg its second wrap — this is the method I use in the video.
Both approaches create the same double‑wrapped foundation, so it really comes down to your personal preference.
Once every peg has two wraps, use your loom hook to lift the bottom loop over the top loop on each peg. This secures your cast‑on and gives you a soft, sturdy edge that will fold beautifully into the brim.
Knitting the Brim
With your cast‑on complete, you’re ready to settle into the brim — the part of the hat that gives it that soft, folded‑over warmth. For my version of the Red Loom‑Knit Warm Hearts Hat, I worked 16 rounds of E‑wrap, which creates an 8‑round folded brim. But here’s the part I really want you to hear: you can make your brim any size you like.
Because the brim is folded in half, you’ll want to knit twice as many rounds as the finished brim height you prefer:
- For a shorter brim (5–7 rounds), knit 10–14 rounds.
- For a taller, cozier brim (10–12 rounds), knit 20–24 rounds.
- Or follow my version with 16 rounds for a classic medium brim.
E‑wrap each round the same way you did during the cast‑on: wrap each peg once, then knit off. The doubled strands make the fabric feel plush and warm as it grows downward through the center of the loom.
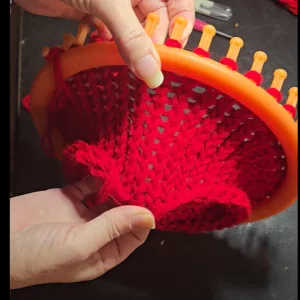
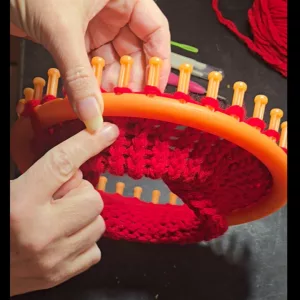
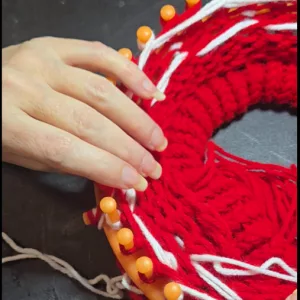
Once you’ve reached your chosen brim length, it’s time to fold it. This step looks a little magical the first time you do it, but it’s simply bringing your cast‑on edge up to meet the pegs.
Reach inside the loom and find the very first row of stitches — the cast‑on loops. One peg at a time, gently lift each cast‑on loop and place it back onto its matching peg. You’ll know you’re doing it right when every peg has two loops sitting on it again.
Now wrap the loom for your next round of E‑wrap. When you knit off, you’ll be lifting both loops over the working yarn. This secures the fold and creates that thick, cozy edge that makes winter hats feel extra warm.
To give the brim a clean transition into the body of the hat, work 1 round of purl stitch, followed by 2 more rounds of E‑wrap. The purl ridge adds a subtle line that helps the brim fold neatly and gives the hat a polished look.
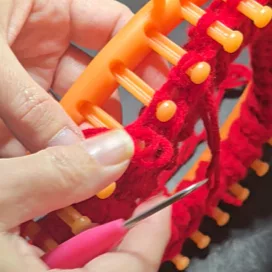
How to Purl (Short & Cozy Guide)
If you’ve never purled on a loom before, this is a gentle place to learn. A loom purl is just a small scoop‑and‑trade motion. Bring your working yarn in front of the peg, then use your hook to scoop the working yarn up from underneath the loop on the peg. Lift the old loop off, and place the new loop you just made onto the peg. It feels a little like swapping loops — slow and steady is all you need.
Heartbeat Stripe (Body of the Hat)
Now that the brim is finished, we move into the body of the hat — and this is where the tiny heartbeat stitches appear. The stripe looks delicate, but it’s just single accent‑color stitches placed with intention.
The Heartbeat Stripe is worked over a small sequence of rounds:
- 2 rounds MC
- 1 heart row
- 2 rounds MC
- 1 offset heart row
- 2 rounds MC
This creates one full “heartbeat” repeat.
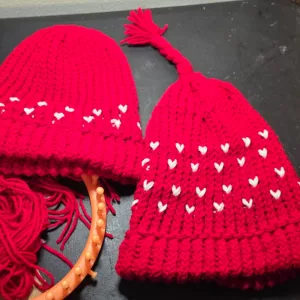
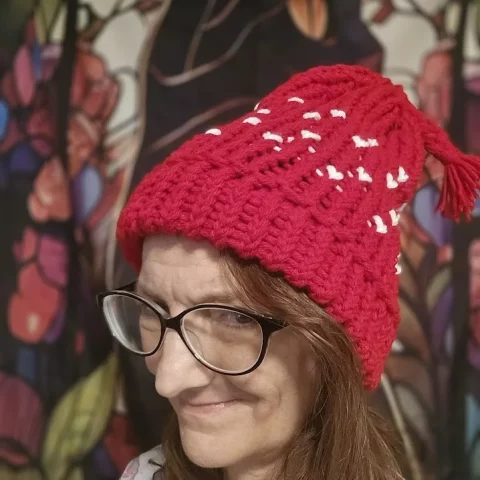
You can work one repeat or as many as you like depending on how bold you want the stripe to be. For the pointy‑top version shown in my photos, I worked two full repeats of the Heartbeat Stripe back‑to‑back. For the flat‑top version, I worked one repeat before moving into the main‑color section.
After your final repeat, you can work as few or as many plain MC rounds as you like before beginning the crown shaping. The number of MC rounds you choose will determine how close the stripe sits to the top of the hat.
Heart Row 1 — “2 MC, 1 AC” Repeat
For this row, you’ll place a single contrast‑color stitch every third peg.
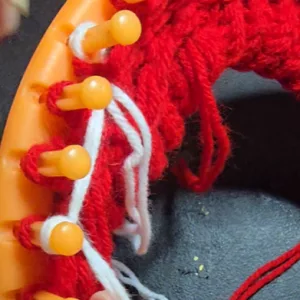
Before you begin the repeat, you’ll need to join your accent color (AC). For the very first AC stitch, simply place a slipknot of your AC onto the peg where that stitch belongs. This anchors the yarn so you can work the stitch cleanly.
Once the AC is attached, follow this rhythm:
- E‑wrap 2 stitches in MC
- Drop MC and pick up AC
- E‑wrap 1 stitch in AC
- Drop AC and return to MC
- Repeat this sequence all the way around the loom
You’ll end the round exactly where you began, with the AC stitches evenly spaced.
After this row, knit 2 full rounds in MC to give the hearts their breathing room.
Heart Row 2 — Offset Hearts (“1 AC, 2 MC” Repeat)
Because your AC is already attached from the first heart row, you can simply pick it up and begin the offset repeat — no slipknot needed here.
This row shifts the hearts so they sit between the ones below, creating that sweet, scattered‑heart look.
The rhythm is:
- E‑wrap 1 stitch in AC
- Switch to MC
- E‑wrap 2 stitches in MC
- Repeat around the loom
This offset is what gives the stripe its heartbeat‑like movement.
Finish the stripe with 2 more rounds in MC to settle the colorwork and transition smoothly back into the solid body of the hat.
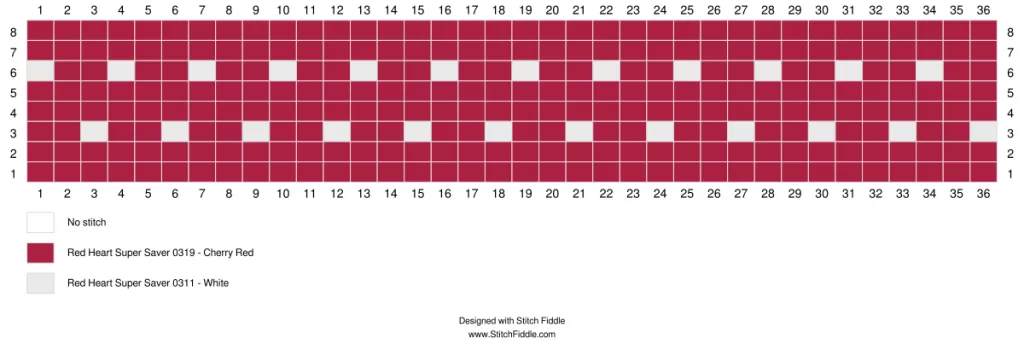
Heartbeat Stripe Chart (Optional Visual Guide)
If you’re a visual learner, here’s a simple chart showing how the heart stitches line up across the loom. Each column represents a peg (1–36), and each row represents a round, read from bottom to top. Red squares are your main color, and white squares mark the single accent‑color stitches that form the hearts.
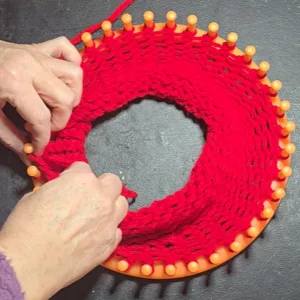
Continuing the Body
Once you’ve finished your Heartbeat Stripe repeats, the rest of the body is simply worked in your main color (MC) until the hat reaches the height you want before shaping the crown. How many rounds you add here depends on the crown style you’re making.
For the pointy‑top version shown in my tutorial photos, I worked two full repeats of the Heartbeat Stripe back‑to‑back. After the second repeat, I only added a small handful of MC rounds—just enough to give the colorwork a clean transition—before moving straight into the decrease sequence. This keeps the heartbeat band sitting closer to the top of the hat and gives the crown that soft, whimsical taper.
For the flat‑top version, I worked one repeat of the Heartbeat Stripe and then continued in MC for several more rounds to build extra height before the decreases. This extra MC section helps the top of the hat stay smoother and more rounded, since the shaping begins farther away from the colorwork.
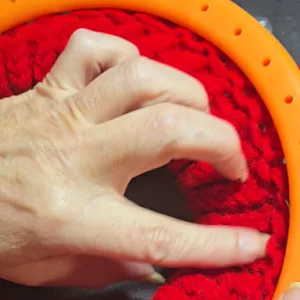
No matter which version you choose, simply continue E‑wrapping in MC until the hat feels right for the style you want. When you’re happy with the height, you’re ready to move into the crown shaping.
Shaping the crown
Once your hat is the height you like above the Heartbeat Stripe, it’s time to shape the crown. For this pattern, I’m using simple decreases right on the loom to create a gentle taper that ends in a soft point. If you’d rather have a flatter top or the quickest possible finish, I’ll talk about those options after we walk through the main version.
We’ll be using two basic decreases:
- K2tog (knit two together): On the loom, this means you’re knitting two stitches as one. To do this, lift the loop from the next peg and place it onto the peg you’re working on, so that peg has two loops. Then E‑wrap that peg and knit off both loops together.
- SSK (slip, slip, knit): This leans the decrease in the opposite direction. On the loom, lift the loop from the peg before the one you’re working on and place it onto that peg, so it now has two loops. Then E‑wrap that peg and knit off both loops together.
Both decreases are just “move one loop over, then knit two loops together,” but the direction you move the loop (from the left or from the right) changes the lean.
Pointed crown (main version)
This is the version shown in my sample. It creates a soft, slightly pointy top that suits the cozy feel of the hat.
Round 1: E‑wrap 5 pegs, then work a K2tog on the 6th peg (move the loop from the next peg onto it, E‑wrap, and knit both loops off together). Repeat this all the way around: E‑wrap 5, K2tog on the 6th.
Round 2: E‑wrap all pegs.
Round 3: Work an SSK (move the loop from the peg before onto the peg you’re working, E‑wrap, and knit both loops off together), then E‑wrap 4 pegs. Repeat this around: SSK, E‑wrap 4.
Round 4: E‑wrap all pegs.
Round 5: E‑wrap 3 pegs, then K2tog on the 4th peg. Repeat around: E‑wrap 3, K2tog on the 4th.
Round 6: E‑wrap all pegs.
Round 7: Work an SSK, then E‑wrap 2 pegs. Repeat around: SSK, E‑wrap 2.
By this point, you’ll have a smaller number of stitches and a nice taper forming at the top of the hat.
To finish, cut your yarn, leaving a long tail, and work a drawstring bind‑off: thread the tail through each remaining loop, remove the loops from the pegs, and pull to close the top. Take a few small stitches on the inside to secure.
Flatter top option
If you’d like a flatter, more rounded top instead of a point, you can skip some of the early shaping so the decreases happen closer together near the top.
A simple way to do this is:
- Skip the first two shaping rounds (the “E‑wrap 5, K2tog” and its plain round).
- Start your decreases later in the sequence (for example, at the “E‑wrap 3, K2tog” round and then the “SSK, E‑wrap 2” round).
This shortens the taper and keeps the top more level before you gather it closed. You’ll still finish with the same drawstring bind‑off.
Quickest, easiest finish
If you’re brand new to loom knitting or just ready to be done, you can skip all the decreases and go straight to the drawstring bind‑off.
- Work your last plain E‑wrap round.
- Cut your yarn, leaving a long tail.
- Thread the tail through each loop on the loom, remove the loops, and pull to close.
This gives you a softly gathered top with no shaping to keep track of—perfect for beginners or last‑minute makes.
Finishing Touches
Once your crown is closed and the top of the hat is secure, you can finish things off with either a tassel or a pom‑pom — whichever fits the vibe you want.
Weaving in Ends
Start by weaving in any remaining yarn tails on the inside of the hat. Follow the path of the stitches so everything blends in neatly. Give the hat a gentle stretch to help the fabric settle into place.
Option 1: Add a Tassel
A tassel gives the Heartbeat Hat a playful, cozy look — especially if you’re making the pointy‑top version.
To make one:
- Wrap your yarn around your hand or a small book until it’s as full as you like.
- Slide the loops off carefully and tie a strand around the top to secure them.
- Cut through the bottom loops to create the fringe.
- Wrap another strand around the top of the tassel to form the “neck,” and knot it tightly.
- Use the long tail to attach the tassel to the very top of the hat, sewing through the crown a few times to secure it.
Trim the ends so the tassel looks even and fluffy.
Option 2: Add a Pom‑Pom
If you prefer a classic finish, a pom‑pom is perfect. You can use a pom‑pom maker, wrap yarn around your hand, or use cardboard circles — whatever method you like best.
Once your pom‑pom is ready:
- Thread the long tails through the center of the crown.
- Tie them securely on the inside.
- Add a couple of small stitches to anchor it so it doesn’t wobble.
- Trim the pom‑pom to shape if needed.
A white pom‑pom looks adorable with the Heartbeat Stripe, but matching red is just as sweet.
No Extra Topper? Totally Fine
If you prefer a clean, simple look, you can skip the tassel or pom‑pom entirely. The crown shaping stands beautifully on its own.
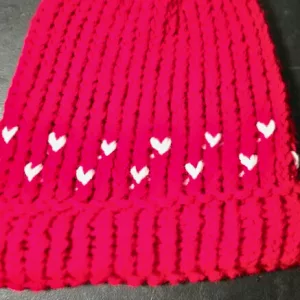
Red Loom‑Knit Warm Hearts Hat
The Red Loom‑Knit Warm Hearts Hat is a cozy, beginner‑friendly project designed to bring a little extra warmth to winter days. Worked on a round loom with two strands of medium‑weight yarn held together, this hat has a soft, bulky feel without needing specialty yarn. A folded brim adds structure and comfort, while the simple heart‑inspired stripe offers a gentle touch of texture and charm.
You can knit the hat exactly as shown in bold red, or make it in any solid color you love — the design is flexible, approachable, and easy to personalize. The heart‑pattern technique was adapted from Late Loomer’s Fair Isle Beanie tutorial, which helped shape the rhythm of the colorwork in this version.
Whether you’re making it for yourself, gifting it to someone who needs a little warmth, or adding a handmade touch to your winter wardrobe, this hat is meant to be comforting, accessible, and full of heart.
Materials
- Red Yarn (Main Color): Red Heart Super Saver in Cherry Red, 2 strands held together
- White Yarn (Accent Color): Mainstays Medium Acrylic in White, 2 strands held together
- Optional: Pom‑pom or tassel
Tools
- 36‑peg round loom (I used the orange Darice 36‑peg loom)
- Loom hook
- Tapestry needle
- Scissors
Instructions
Cast On
Cast on with the Double E‑Wrap method by wrapping each peg twice using two strands of yarn held together. This creates a stretchy, sturdy foundation that pairs perfectly with the folded brim.
Side Note:
For the Double E‑Wrap Cast On, use whichever method feels most natural:
- Method 1: Wrap and knit one peg at a time, wrapping each peg twice before lifting the bottom loop over the top.
- Method 2: Wrap all pegs once, then go around again to wrap each peg a second time before knitting off.
Both methods create the same flexible edge.
Brim
- E‑wrap 16 rounds in red (MC).
- Fold the brim inward so the cast‑on edge meets the pegs.
- One peg at a time, lift each cast‑on loop and place it back onto its matching peg all the way around the loom.
- E‑wrap the next round, then lift both loops (the loop from folding the brim in and the loop from the previous round) over the working yarn to secure the folded brim.
- Work 1 round of purl to create a crisp transition ridge.
- Work 2 rounds of E‑wrap in MC.
Heartbeat Stripe Pattern
This simple sequence creates a soft, repeating heart‑inspired motif.
Heartbeat Repeat
- Round A: 2 rounds E‑wrap in MC
- Round B: 1 round of 2 pegs MC, 1 peg AC — repeat around
- Round C: 2 rounds E‑wrap in MC
- Round D: 1 round of 1 peg AC, 2 pegs MC — repeat around
- Round E: 2 rounds E‑wrap in MC
Repeat this 1–3 times depending on how many heart stripes you want.
Body of the Hat
After your final heartbeat repeat, work additional rounds of E‑wrap in MC until the hat reaches your desired height.
Crown Shaping Options
Choose the crown style you prefer. Both are worked with two strands held together.
Option 1: Pointed Crown (Soft, Gentle Taper)
This version creates a sweet, whimsical point — not sharp, just a soft taper that suits the cozy feel of the hat.
Round 1: E‑wrap 5 pegs, K2tog on the 6th peg — repeat around.
Round 2: E‑wrap all pegs.
Round 3:SSK, then E‑wrap 4 pegs — repeat around.
Round 4: E‑wrap all pegs.
Round 5: E‑wrap 3 pegs, K2tog on the 4th peg — repeat around.
Round 6: E‑wrap all pegs.
Round 7:SSK, then E‑wrap 2 pegs — repeat around.
Continue to the Drawstring Bind‑Off section.
Option 2: Flat Top (Skip Ahead for a More Rounded Finish)
If you prefer a flatter, more level crown, you can shorten the taper by skipping the early shaping.
To work the flat top:
- Skip Rounds 1–2 of the pointy sequence
- Begin directly with the shaping that starts at Round 5 (E‑wrap 3, K2tog)
- Then continue with Round 7 (SSK, E‑wrap 2)
This creates a smoother, less pointed crown before gathering.
Continue to the Drawstring Bind‑Off section.
Option 3: Quickest & Easiest (No Decreases)
If you want the simplest finish — or you’re teaching a beginner — you can skip all decreases entirely.
Just:
- Cut your working yarn
- Leave a long tail
- Move straight to the Drawstring Bind‑Off
This creates a softly gathered top with no shaping required.
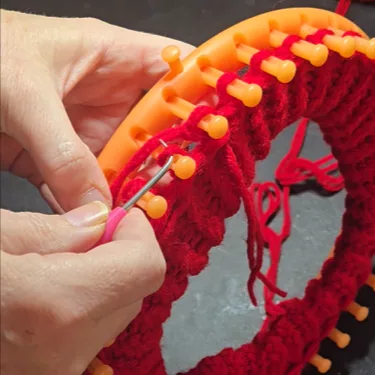
Drawstring Bind‑Off (All Crown Options)
- Cut your working yarn, leaving a tail about 18–24 inches long.
- Thread the tail onto a yarn needle.
- Insert the needle through each remaining loop from bottom to top, removing the loop from the peg as you go.
- Once all loops are on the yarn tail, gently pull to close the top of the hat.
- Pass the needle through the center of the gathered stitches and pull to the inside.
- Take a few small stitches around the inside of the crown to secure.
- Weave in the tail.
Notes
Notes
- The heart‑pattern technique was adapted from Late Loomer’s Fair Isle Beanie tutorial.
- Using two strands of medium‑weight yarn gives the warmth of bulky yarn with more color flexibility.
- The hat works beautifully in any solid color if you prefer a simpler look.
Recommended Products
As an Amazon Associate and member of other affiliate programs, I earn from qualifying purchases.


Final Thoughts
I hope this Heartbeat Hat brought a little warmth and joy to your needles today. There’s something so comforting about watching those tiny hearts appear one by one, and I love how each version — pointy top, flat top, tassel, pom‑pom — takes on its own personality. Whether you’re making this for yourself, a little one, or someone who needs a reminder that they’re loved, I hope the process felt as soothing and satisfying for you as it did for me.
If you make your own Heartbeat Hat, I would love to see it. Share a photo, tag me, or drop a comment — your projects genuinely make my day, and they help other makers feel inspired and brave enough to try something new.
Thank you for spending your time here and for supporting my cozy corner of the internet. I’m so grateful you’re part of this little creative community. Until next time, I hope your yarn stays tangle‑free, your loom stays kind, and your stitches bring you comfort. If you want something more to explore, you might enjoy a few of my other posts:
Four Loom Knit Scarf Patterns Coming Soon: Behind the Scenes of My New Collection
10 Free Valentine’s Crochet Patterns to Make This Month
Free Seasonal Crochet Patterns – Free & Festive for Every Occasion
Free with Prime: Read & Listen — Kindle Ebooks You’ll Love
If you try any of these, I’d love to see your creations — share them with me on social so we can celebrate your cozy makes together — you can find me here:
YouTube: Angel Wings It
Instagram: @angelwingsit
Pinterest: Angel Wings It
Facebook: Angel Wings It
Benable: Angel Wings It
This post contains affiliate links, which means I may earn a small commission if you shop through them—at no extra cost to you. I’m partnered with Amazon, Walmart, and other brands through programs like Collective Voice and Mavely. I only share products I truly love or think you’ll find helpful.

One Comment