
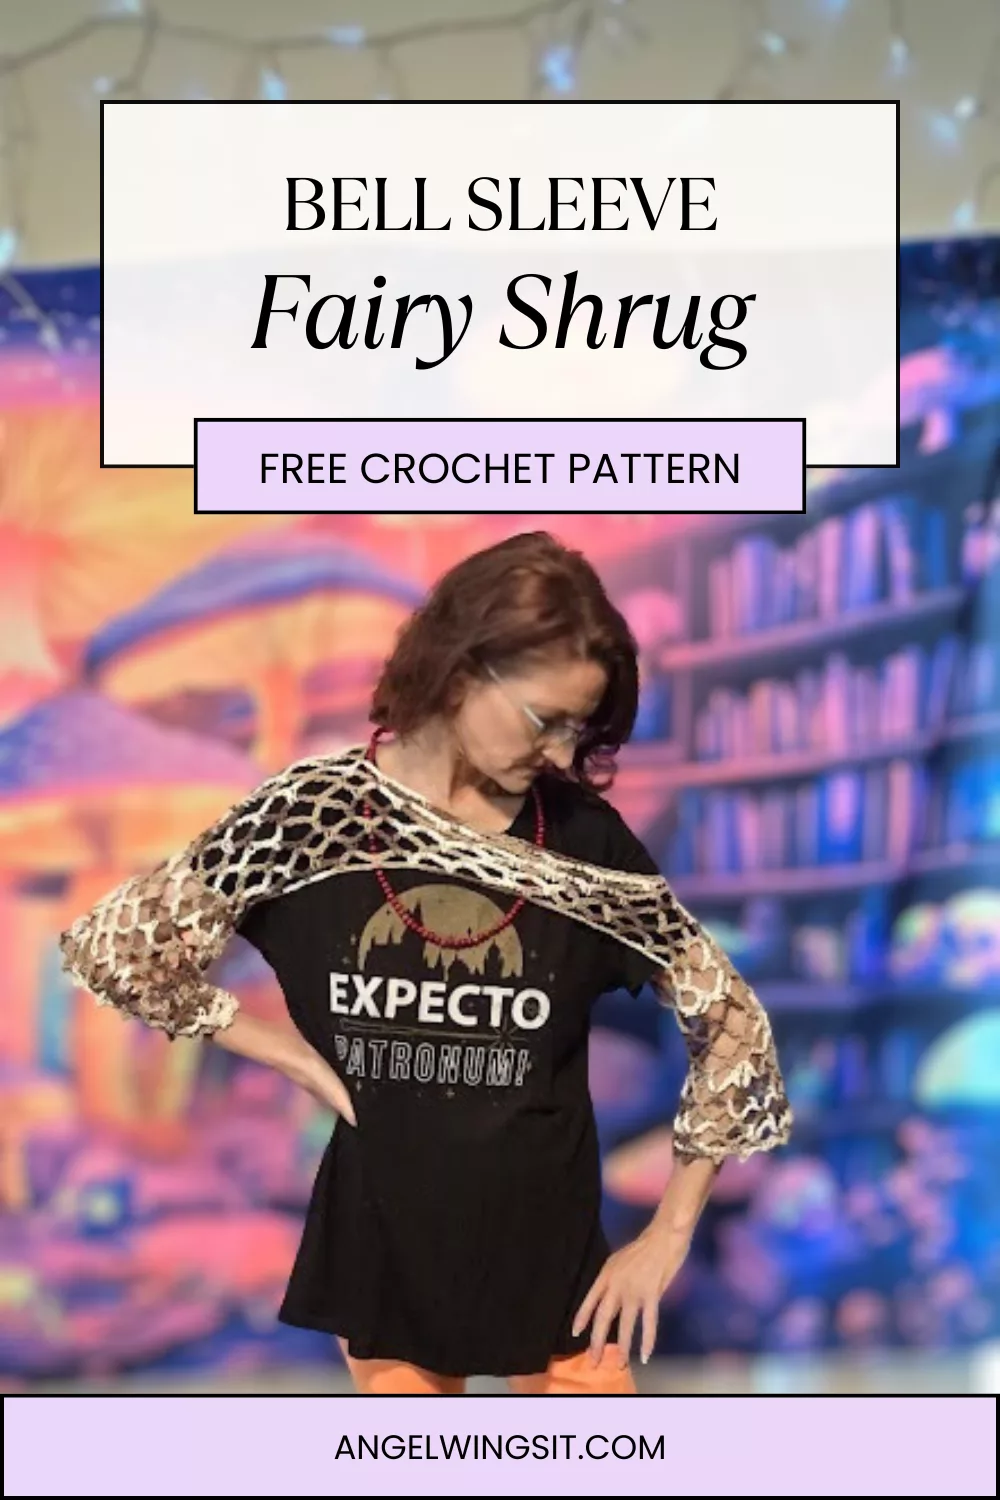
Bell Sleeve Fairy Shrug Free Crochet Pattern
This post contains affiliate links, which means I may earn a small commission if you shop through them—at no extra cost to you. I’m partnered with Amazon, Walmart, and other brands through programs like Collective Voice and Mavely. I only share products I truly love or think you’ll find helpful.
🧚♀️ Bell Sleeve Fairy Shrug – A Cozy Crochet Spell
Wrapped in softness and stitched with a little magic, the Bell Sleeve Fairy Shrug is here to enchant your wardrobe and soothe your crafting soul. Inspired by fairycore whimsy and spoonie-friendly comfort, this shrug was designed for gentle days, dreamy layering, and flare-friendly fashion that feels like a hug.
Whether you’re curled up with yarn on a rainy morning or looking for a cozy piece to wear over your favorite dress, this pattern invites you to slow down, stitch softly, and create something that moves with you. With dramatic bell sleeves, openwork texture, and adjustable fit, it’s perfect for beginners and seasoned makers alike.
Scroll down for styling tips, yarn suggestions, and the full pattern. Let’s stitch a little magic together 💫
✨ Design Highlights
The Bell Sleeve Fairy Shrug is all about softness, movement, and magical layering. It’s designed to be spoonie-friendly, beginner-accessible, and endlessly customizable. Whether you’re dressing up for a cozy autumn stroll or layering over loungewear on a flare day, this shrug adds a touch of whimsy to any outfit.
Here’s what makes it special:
📏 Custom Sleeve Length: Make them short and fluttery or long and dramatic—your shrug, your vibe
🧶 Bell Sleeves: Dramatic and flowy, with picot edging for a fairycore finish
🧵 Openwork Texture: Light and breathable, perfect for transitional weather
🪡 Adjustable Fit: No strict gauge—just frequent try-ons and gentle shaping
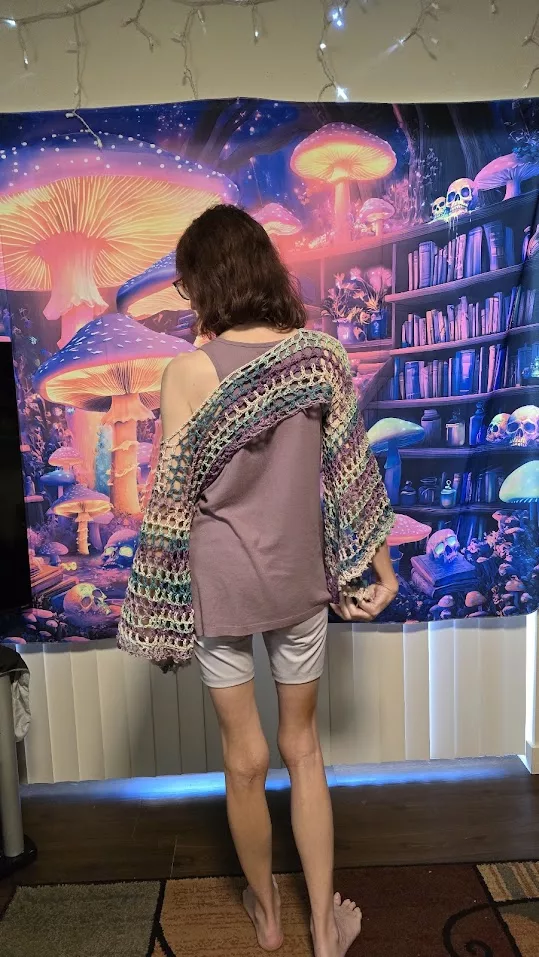
Styled in two different lengths, you can see how the shrug shifts from playful to ethereal depending on how far you take the sleeves. Whether you’re going for cottagecore charm or full fairy fantasy, this pattern lets you choose your own adventure.
🧵 Materials & Yarn Suggestions
This shrug is designed to be flexible and forgiving—perfect for low-energy crafting and stash-busting joy. You’ll only need a few basics to get started:
🧶 Materials:
- Medium weight yarn (approx. 400 yds total)
- 5 mm crochet hook (or size recommended for your yarn)
- Tapestry or darning needle for weaving in ends
- Stitch markers (optional, but helpful for panel shaping)
🌸 Yarn Notes:
I used Peaches & Cream in Lavender Meadow and Chocolate Milk Ombre for the examples shown. The cotton yarn gives a soft, breathable drape that’s perfect for layering—but feel free to experiment with acrylic blends, lightweight wool, or even sparkly fairycore textures.
If you’re looking for yarn deals or spoonie-friendly picks, check out my Benable list of Cozy Yarn Favorites for curated options that work well with this pattern.
🌿 Fit & Accessibility Notes
This shrug was designed with comfort and flexibility in mind—because crafting should feel like a soft exhale, not a test of endurance. There’s no strict gauge here, and no need to chase perfection. Instead, you’ll shape the fit through frequent try-ons and gentle adjustments as you go.
💫 Fit Highlights:
- Customizable Width & Length: Start with a chain that matches your shoulder width, then build panels to your preferred coverage
- Adjustable Sleeves: Make them short and fluttery or long and dramatic—both versions are shown in the photos
- Minimal Seaming: Panels are joined with slip stitches using front and back loops for a soft, flexible finish
- Flare-Friendly Flow: The stitch pattern is repetitive and soothing, perfect for low-energy days or mindful making
Whether you’re crafting in bed, at your favorite cozy corner, or during a quiet moment of self-care, this shrug is meant to move with you—physically and emotionally.
🧺 Get the Pattern
Ready to stitch your own Bell Sleeve Fairy Shrug? You’ve got two cozy options:
- 🧶 Free Version: Scroll down to view the full pattern right here on the blog—no paywall, just comfort-core crochet shared with love.
- 📄 Printable PDF: Prefer a clean, ad-free version you can download and keep? Grab the printable PDF for just $2.00 on Ravelry: Buy the PDF on Ravelry
Whether you’re crafting in bed, curled up with yarn, or dreaming of mushroom forests and cozy corners, this shrug is here to wrap you in softness.
🧚♀️ Stitch gently, style magically, and make it your own.

Bell Sleeve Fairy Shrug
Materials
Any Medium weight yarn, approx. 400 yds total, Examples used:
Tools
- 5 mm crochet hook or recommended hook for yarn
- Tapestry or darning needle to sew in ends
Instructions
Back Panel:
Chain a length that matches your shoulder width in a multiple of 4 plus 3.
Row 1: Chain 5, [sc in 5th ch from hook, ch 5, sk 5] across, turn.
Row 2 and onward: Chain 5, [sc in next ch-5 space, ch 5] across, turn.
Repeat until the panel reaches from the bottom of your armpit to the middle of your chest, depending on your desired length.
Front Panel:
Row 1 (Front Panel): Ch 5, then repeat [sc, ch 5, sk 5] five times. Pause here. From the opposite end of the panel, count four ch-5 spaces inward and place a stitch marker in that fourth ch-5 space. Now, measure the distance (number of chain stitches) from the end of your last sc before the gap to the beginning of the ch-5 space where your next sc will be placed after the gap (the marked ch-5 space). Chain that number to bridge the center gap. Then continue across the row with [sc, ch 5, sk 5] four more times, ending with a sc. Turn.
Pause here and make sure it fits over your head and isn’t falling off both shoulders. You may need to adjust the number of chains and the spacing of the shoulders.
Row 2: Chain 5, [sc in next ch-5 space, ch 5] x 5, You will now work into the chain bridge. Skip the first 5 individual chains of this bridge. Then, [*sc in the next individual chain of the bridge, ch 5, skip 5 individual chains*] across the remaining bridge stitches. Once you pass the bridge, continue with [*sc in next ch-5 space, ch 5*] for the final 4 repeats, turn.
Row 3 and onward: Chain 5, [sc in next ch-5 space, ch 5] across, turn.
Repeat until the panel reaches the same length as the back panel.
Final Row: Chain 5, [sc in next ch-5 space, ch 5] across, chain 1, slip stitch along the seam using FLO on one panel and BLO on the other, joining across two corresponding loops to form a 2-stitch seam.
First Sleeve:
Work around the armhole just created.
Rows 1–4: Chain 5, [sc in next ch-5 space, ch 5] around, sl st to first sc.
Row 5: Chain 5, [[sc, ch 5] x4, [sc, ch 5] x2 in same space] around, sl st to first sc.
Rows 6–8: Chain 5, [sc in next ch-5 space, ch 5] around, sl st to first sc.
Row 9: Chain 5, [[sc, ch 5] x6, [sc, ch 5] x2 in same space] around, sl st to first sc.
Rows 10–12: Chain 5, [sc in next ch-5 space, ch 5] around, sl st to first sc.
Row 13: Chain 5, [[sc, ch 5] x8, [sc, ch 5] x2 in same space] around, sl st to first sc.
Rows 14 and onward: Chain 5, [sc in next ch-5 space, ch 5] around, sl st to first sc.
Once sleeve is desired length immediately add edging
Sleeve Edging:
Round 1: Chain 1, [sc, ch 3] in each ch-5 space around, sl st to beginning sc.
Round 2: Chain 3, [sc, picot (ch 3, sl st in 3rd ch from hook), sc] in each ch-1 space around, sl st to beginning sc. F/O and weave in ends
Second Sleeve:
Create a slip knot. Holding both panels together, begin at the other bottom corner and slip stitch along the seam using the FLO on one panel and the BLO on the other, joining across two corresponding loops to form a 2-stitch seam
Work around the armhole just created.
Rows 1–4: Chain 5, [sc in next ch-5 space, ch 5] around, sl st to first sc.
Row 5: Chain 5, [[sc, ch 5] x4, [sc, ch 5] x2 in same space] around, sl st to first sc.
Rows 6–8: Chain 5, [sc in next ch-5 space, ch 5] around, sl st to first sc.
Row 9: Chain 5, [[sc, ch 5] x6, [sc, ch 5] x2 in same space around], sl st to first sc.
Rows 10–12: Chain 5, [sc in next ch-5 space, ch 5] around, sl st to first sc.
Row 13: Chain 5, [[sc, ch 5] x8, [sc, ch 5] x2 in same space around], sl st to first sc.
Rows 14 and onward: Chain 5, [sc in next ch-5 space, ch 5] around, sl st to first sc.
Sleeve Edging:
Round 1: Chain 1, [sc, ch 3] in each ch-5 space around, sl st to beginning sc.
Round 2: Chain 3, [*sc, picot (ch 3, sl st in 3rd ch from hook), sc*] in each **ch-3 space** around, sl st to beginning sc. F/O and weave in ends.
Notes
Gauge:
Gauge is not critical for this pattern as fit is determined by the initial chain length and frequent try-ons. However, to ensure your shrug matches the intended drape and overall look, it's recommended to do frequent fit checks as you work. This allows you to adjust the length of your panels and sleeves to your desired fit
Stitches Used/ Abbrevations
Sc: Single crochet
Dc: Double crochet
Ch: Chain
Sk: Skip
Sl st: Slip Stitch
FLO: Front Loop Only
BLO: Back Loop Only
Picot: (chain 3, sl st in 3rd chain from hook)
Single crochet (sc) stitches are worked into the chain-5 space, except for Row 1 of the back panel and the middle section of Row 2 in the front panel, where they are worked into the chain itself.
Recommended Products
As an Amazon Associate and member of other affiliate programs, I earn from qualifying purchases.
-
 Pnytty 109pcs Crochet Hooks Kit Include 9pcs Ergonomic Crochet Hooks, 50g Premium Polyester Fiber Fill, Plastic Eyes, Noses, Crochet Tool Kit for Arthritic Hand Knitting Craft Handmade Crochet Project
 -
Lily Sugar 'N Cream The Original Ombre Yarn, 2oz, Gauge 4 Medium, 100% Cotton, Jewels - Machine Wash & Dry
-
Lily Sugar'n Cream Cotton Cone Yarn, 14 oz, Chocolate Ombre, 1 Cone


💌 Final Stitch
Thank you for joining me on this magical little shrug journey. I hope the Bell Sleeve Fairy Shrug brings you as much joy to make and wear as it brought me to design. Whether you’re crafting through a quiet morning or winding down after a long day, may each stitch feel like a soft exhale.
If you make your own version, I’d love to see it! Tag me (@realangelwingsit)on social or share your photos in the Angel Wings It Crochet & Comfort Facebook Group—it’s a cozy space for makers, spoonies, and comfort-core creatives to connect and celebrate their work.
📌Pin It

🧚♀️ Until next time, stay soft, stay magical, and keep stitching gently.
— Angel 💜
This post contains affiliate links, which means I may earn a small commission if you shop through them—at no extra cost to you. I’m partnered with Amazon, Walmart, and other brands through programs like Collective Voice and Mavely. I only share products I truly love or think you’ll find helpful.


3 Comments