
Crochet Cobweb Shrug Pattern Review: Tips, Mods & Yarn Yardage
This post contains affiliate links, which means I may earn a small commission if you shop through them—at no extra cost to you. I’m partnered with Amazon, Walmart, and other brands through programs like Collective Voice and Mavely. I only share products I truly love or think you’ll find helpful.
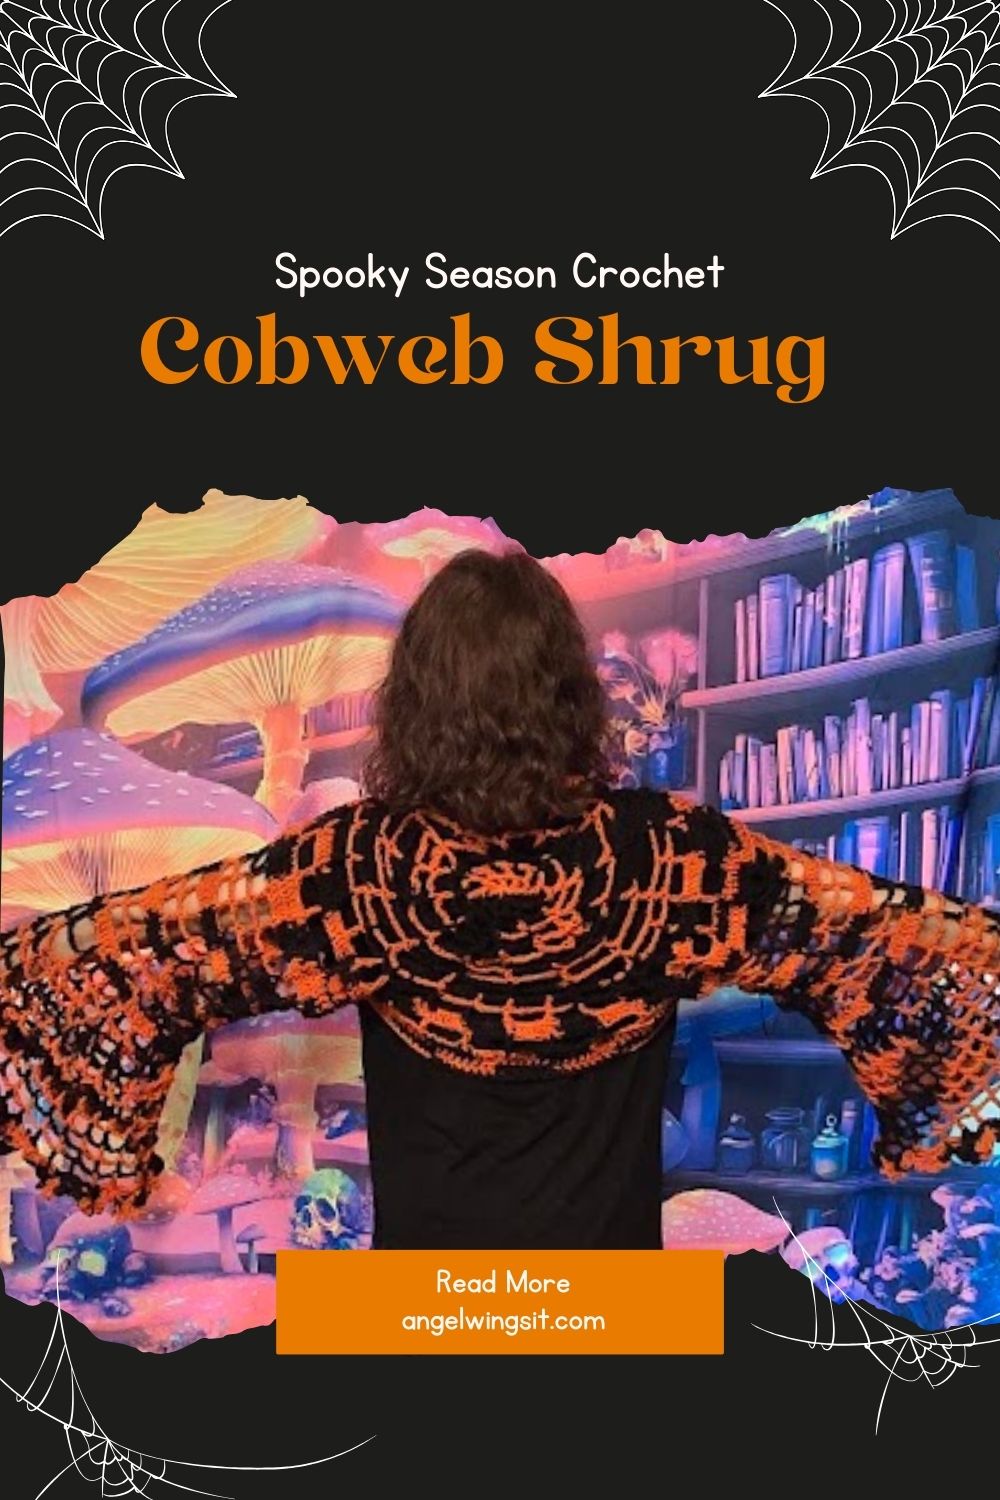
🕸️ The Crochet Cobweb Shrug: Confusion, Clarifications, and a Close Call with Yarn Chicken
Every so often a project comes along that’s just the right mix of gorgeous, challenging, and occasionally bewildering. For me, that was the Hobbii Crochet Cobweb Shrug—only I didn’t make it in the recommended mohair blend. Oh no. I went full Halloween mode with a mystery orange-and-black variegated acrylic that practically screamed spooky season.
And while I’m thrilled with how it’s turning out, I’ll be the first to admit… this one and I had a few “are we even speaking the same language?” moments.
🧶 Starting Out: Love at First Stitch
The Crochet Cobweb Shrug is worked as one large square, grown round by round from the center outwards until it’s the size you need. Sounds straightforward, right? I was swooning over the webby lace pattern from the first few rounds. My yarn changed color quickly, so the black and orange stripes and mottles gave it a bit of a flickering-candle vibe.
Then came the first head-tilt moment: making the sleeve holes.
🪡 The Sleeve Hole Mystery
Even though I’d just made a couple of shrugs recently, I could not, for the life of me, see where this pattern was telling me to fold and join. I’d read the instructions multiple times, hook in hand, and for some reason, my brain just wasn’t matching the words to the actual construction.
The part that really tripped me up was the joining chains. The pattern would say “chain 3” or “chain 5” as part of the fold‑and‑join, but I wasn’t registering that those chains were themselves making the join across to the opposite edge. I kept reading it as… well, I don’t even know where I thought that chain was supposed to be connecting — just somewhere, but not actually creating the link between the two sides.
After a lot of folding, unfolding, and asking my AI sidekick to walk me through it like I was learning crochet for the first time, the lightbulb finally went on:
- You work the square until it’s the right width.
- The last joining round isn’t just a border — it’s literally the point when you fold the square in half and those chains are what bridge the gap to the opposite side.
- Once you make those joins, the 6‑space sides actually are your armholes — the chain connects the edges and leaves that perfect opening for your sleeves.
Once I could picture the chains acting as the join, the whole thing made perfect sense — but wow, it was a detour to get there.

🧵 Sleeves and the “Where Does This Stitch Go?” Game
After the armholes were formed, I started on the sleeves. The lace repeat was fun once I got the rhythm, but the sleeve border instructions? That sent me right back into “wait… what?” territory.
The main confusion point was Round 2 of the cuff: five treble crochets, each with a picot, all in the same stitch, anchored by single crochets spaced three stitches away. What wasn’t obvious at first was that those big picot fans grow from the chain spaces, and the single crochets go into the tops of the double crochets. That placement gives the cuff its dramatic, flared cobweb edge.
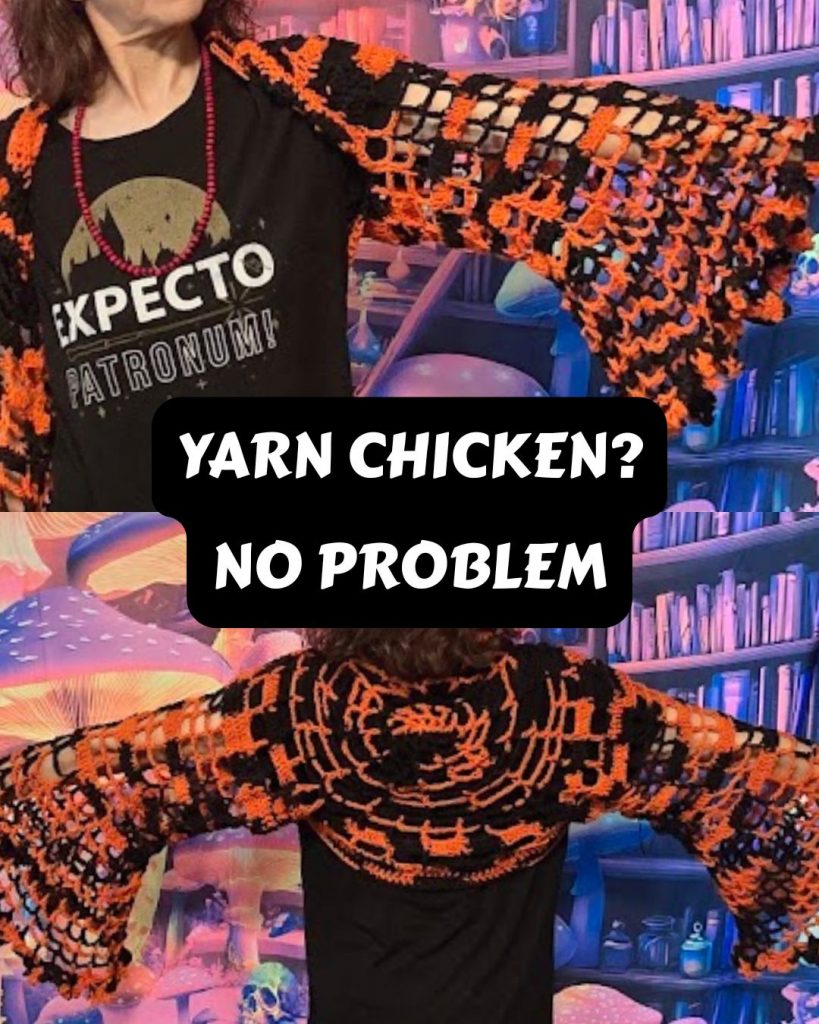
🐓 The Yarn Chicken Showdown
Everything was going smoothly until the very end of my second sleeve border. I was halfway through the picots when I looked down and saw that dreaded little yarn pancake left in my lap. I did the mental math: either frog back or try to find more yarn.
Naturally, I took a quick detour to hunt down a match — checking my stash, scouring local shops, diving into the depths of online listings. But my elusive orange‑and‑black variegated had apparently vanished from the face of the earth. Not a skein to be found.
And because I can’t help myself, that little search rabbit hole turned into something else entirely: a Benable list of Halloween‑themed yarns I discovered along the way. If I couldn’t find my exact match, at least I could share the spooky‑season inspiration with my fellow makers.
With no reinforcements coming, I went back to the shrug and chose option three — improvise. I alternated clusters of 4 picots with the original 5, and I’m happy to report it is absolutely not noticeable unless you’re counting stitches with a magnifying glass. In fact, it adds a tiny bit of irregular, haunted charm. And best of all, I crossed that finish line without having to frog a single row.
🖤 The Back Cobweb Debate
The final step in the pattern is adding “back webs” between the sleeves — delicate little lace panels that tie the whole shrug together. Normally, I’d dive right in… but there’s a snag. I’ve officially run out of my orange-and-black variegated yarn, and after scouring shops and online listings, I can’t find anything remotely close.
So now I’m at a crossroads:
- Option 1: Call it done. The shrug already makes a statement, and leaving the back open could feel airy, light, and a little witchy-minimalist.
- Option 2: Finish the webs in solid black. It wouldn’t match the variegation, but it might frame the whole piece beautifully — like a shadow creeping in behind the flames.
Both have their appeal, and honestly, part of me loves the idea of letting the yarn decide for me. But I’d really like to know what you think. Would you leave the back web-free, or finish it with black to complete the silhouette? Let me know in the comments — this is one of those “makers’ choice” moments.
✨ Final Thoughts
Even with the head-scratching moments, this shrug is one of the most satisfying seasonal pieces I’ve made in a while. The structure is clever, the sleeves are pure drama, and the whole thing just feels Halloween-ready.
And honestly, there’s something kind of poetic about a cobweb shrug that forces you to slow down, puzzle things out, and maybe weave in a little improvisation. After all, spiderwebs themselves aren’t perfect — they’re organic, adaptable, and beautiful because of it.
Your turn: Would you leave the back webs off entirely, or finish them in black for a dramatic contrast? Drop your opinion in the comments — I’ll be tallying votes before the hook comes back out.
Until then, happy haunting (and happy hooking). 🕷️🧶
This post contains affiliate links, which means I may earn a small commission if you shop through them—at no extra cost to you. I’m partnered with Amazon, Walmart, and other brands through programs like Collective Voice and Mavely. I only share products I truly love or think you’ll find helpful.

One Comment