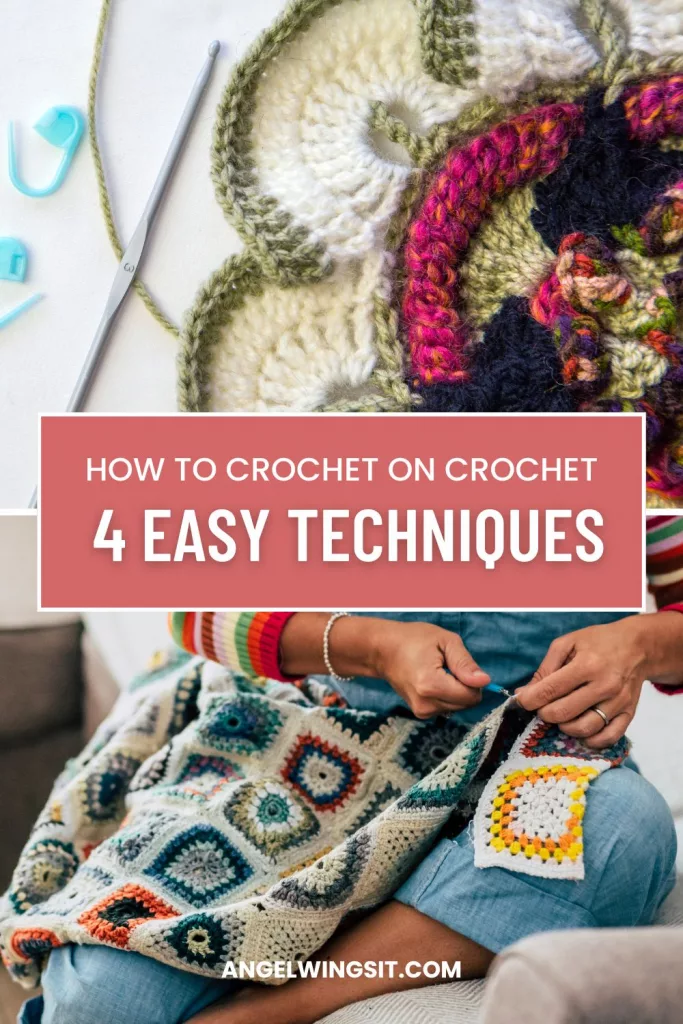

Ever wondered how to crochet on crochet? Whether you’re adding borders to a finished blanket, embellishing garments with surface stitches, or layering textures for a whimsical effect, crocheting on existing crochet fabric opens up a world of creative possibilities. This versatile technique lets you transform simple pieces into personalized works of art—without starting from scratch. In this post, we’ll explore beginner-friendly methods, answer common questions, and share inspiring project ideas to help you master crochet on crochet with confidence. From appliqués to seams and decorative overlays, you’ll learn how to stitch gently and creatively on top of your own crochet creations.
This post contains affiliate links. As an Amazon Associate and Walmart Creator, I earn from qualifying purchases. I may also earn a commission through other affiliate programs at no extra cost to you. I only share products I genuinely find useful or interesting.
🧶 What Does “Crochet on Crochet” Mean?
At its core, crochet on crochet refers to the technique of adding new stitches, textures, or embellishments directly onto an existing piece of crochet fabric. Instead of starting from scratch, you build on what’s already there—whether it’s a finished blanket, a garment panel, or a decorative motif. This method opens up a world of creative possibilities, from adding borders and appliqués to layering stitches for visual depth and tactile interest.
Think of it as crocheting with intention on top of your own work. You might use surface crochet to outline shapes, add lettering, or create vines and swirls across a plain background. You might join two panels using slip stitches or whip stitch seams, effectively crocheting one piece onto another. Or you might embellish a finished shrug with flowers, stars, or fairycore accents using simple appliqué techniques.
The beauty of crochet on crochet is that it’s both decorative and functional. It allows you to:
- Add borders to blankets, shawls, or garments
- Seam pieces together without sewing
- Embellish with motifs, embroidery, or surface designs
- Reinforce edges or reshape areas
- Customize fit and style after the main piece is complete
This technique is especially helpful for spoonie crafters and comfort-core makers who prefer low-pressure, modular crafting. You can work in small bursts, revisit old projects, or gently upgrade pieces without unraveling or restarting. It’s also a great way to experiment with color, texture, and layering—perfect for fairycore, cottagecore, or maximalist aesthetics.
There are several common methods used to crochet on crochet:
✨ Popular Techniques for Crocheting on Crochet
Crochet on crochet is a versatile technique that allows you to build new textures, embellishments, and structural elements directly onto existing crochet fabric. Whether you’re adding decorative flourishes or joining panels, these methods offer gentle ways to personalize your work without starting from scratch. Here are the most popular techniques used by makers of all skill levels:
🧶 Surface Crochet
Surface crochet is one of the most beginner-friendly ways to crochet on crochet. It involves working slip stitches or single crochet directly onto the surface of a finished piece. You insert your hook through the top loops of the existing stitches and stitch across the fabric like embroidery. This technique is perfect for outlining shapes, adding lettering, or creating whimsical paths and vines. It’s especially popular in fairycore and cottagecore designs, where texture and visual storytelling matter.
Surface crochet involves slip stitching or single crocheting directly onto the surface of finished crochet fabric. It’s perfect for outlines, lettering, vines, and decorative paths.
Tips:
- Use a contrasting yarn for visibility
- Keep tension loose to avoid puckering
- Try it on double crochet backgrounds for smoother glide
Example Patterns:
- Surface Crochet Christmas Coasters – Nordic Hook
- Perfectly Plaid Surface Crochet – A Crocheted Simplicity
- Surface Slip Stitch Tutorial – Raffamusa Designs
🌸 Crochet Appliqué
Crochet appliqué lets you attach motifs—like flowers, stars, hearts, or mushrooms—onto finished crochet pieces using crochet stitches instead of sewing. You can slip stitch or single crochet around the edges of your motif to secure it in place. This method adds dimension and charm to garments, bags, and accessories, and is ideal for upcycling older projects with fresh flair.
Crochet appliqué lets you attach motifs—flowers, stars, mushrooms—onto finished pieces using crochet stitches instead of sewing.
Tips:
- Use slip stitch or single crochet to secure motifs
- Match yarn weights for smoother joins
- Great for upcycling garments or adding seasonal flair
Example Patterns:
- 27 Free Appliqué Patterns – Handy Little Me
- 35+ Appliqué Ideas – Sarah Maker
- Zoo Animals Appliqué – Crochet News
🔗 Joining with Crochet
Instead of sewing panels together, many makers use crochet stitches to join pieces. Slip stitch seams, whip stitch joins, and even decorative methods like picot edging can be used to connect panels while adding visual interest. This technique is especially useful for modular projects like shrugs, blankets, or patchwork garments, where flexibility and softness are key.
Instead of sewing, use crochet stitches to join panels—slip stitch, whip stitch, or decorative seams like picot edging.
Tips:
- Align stitches carefully for clean joins
- Use stitch markers to keep panels even
- Choose joining method based on desired texture (flat vs raised)
Example Tutorials:
- 12 Ways to Join Crochet Squares – Moogly
- Joining Panels for Beginners – CyCrochet
- Seaming Crochet Pieces – The Knotty Lace
🧵 Overlay Crochet
Overlay crochet is a more advanced method that involves layering stitches to create raised patterns and textures. It’s often used in mandalas, tapestry-style designs, and statement pieces. While it requires more planning and precision, overlay crochet can be combined with surface techniques for dramatic, sculptural effects.
Overlay crochet creates raised textures by working stitches over previous rows. It’s ideal for mandalas, mosaic designs, and statement pieces.
Tips:
- Use charts or visual guides for accuracy
- Alternate colors for dramatic effect
- Combine with surface crochet for layered magic
Example Patterns:
- Overlay Mosaic Crochet – HanJan Crochet
- Overlay Crochet Guide – CyCrochet
- Reversible Overlay Mosaic – Nicki’s Homemade Crafts
🧺 Tools & Materials You’ll Need
Before you dive into the gentle magic of crochet on crochet, it helps to gather a few essential tools and materials that make the process smoother, more enjoyable, and spoonie-friendly. Whether you’re adding surface stitches, joining panels, or embellishing with appliqués, having the right setup can turn a simple project into a cozy masterpiece.
🧶 Crochet Hooks
You’ll want a hook that matches the yarn weight of your base project. For surface crochet or overlay techniques, a slightly smaller hook can give you more control and precision. If you’re working with appliqués or joining panels, stick with the same size hook used in the original piece to maintain consistency.
Comfort tip: Ergonomic hooks with soft grips are ideal for low-energy crafting and flare-friendly routines.
🧵 Yarn
Choosing yarn for crochet on crochet depends on your goal. For decorative accents, contrast colors or textures (like metallics or fuzzies) add visual interest. For structural joins or borders, match the fiber and weight of the original piece to ensure durability and drape.
Layering tip: Cotton yarns work well for crisp surface stitches, while acrylics offer flexibility for appliqués and joins.
📍 Stitch Markers
These little helpers are essential for planning placement—especially when adding borders, motifs, or seams. Use them to mark corners, edges, or alignment points before you start crocheting on top of your fabric.
Bonus: Try locking stitch markers for added security, especially when working on textured or openwork pieces.
✂️ Tapestry Needle
A blunt-tipped tapestry needle is perfect for weaving in ends, securing appliqués, or tidying up joins. It’s also handy for reinforcing areas where crochet stitches meet or overlap.
📐 Measuring Tape
If you’re adding borders or joining panels, a measuring tape helps ensure symmetry and fit. This is especially useful for wearable projects like shrugs, cardigans, or patchwork garments.
🧼 Blocking Tools (Optional)
For overlay crochet or detailed surface work, blocking mats and pins can help shape and flatten your finished piece. This step is optional but adds polish—especially if you’re gifting or selling your work.
🧺 Optional Comfort-Core Additions
- A cozy lap tray or yarn bowl for easy access
- A soft light or daylight lamp for gentle visibility
- A project pouch to keep your tools organized and spoonie-friendly
Having the right tools doesn’t mean having all the tools—it means choosing what supports your energy, creativity, and comfort. Crochet on crochet is a forgiving, adaptable technique that lets you work in small bursts, revisit old projects, and add magic to your makes without overwhelm.
So what’s in your toolkit? A favorite hook? A go-to yarn combo? Or maybe just a quiet moment and a cozy corner? Whatever you bring to the table, let it be soft, supportive, and uniquely yours.
❓ Frequently Asked Questions
Crochet on crochet is a versatile and beginner-friendly technique, but it often sparks questions—especially if you’re trying it for the first time or adapting it to a comfort-core workflow. Here are answers to some of the most common questions makers ask when layering stitches, joining panels, or embellishing finished pieces.
🧶 Can you crochet on top of crochet fabric?
Yes! That’s the heart of crochet on crochet. You can add new stitches—like slip stitch, single crochet, or even decorative motifs—directly onto existing crochet fabric. This works beautifully for borders, surface designs, and appliqués. Just be mindful of your tension and hook size to avoid puckering or distortion.
🧵 What’s the difference between surface crochet and overlay crochet?
Surface crochet involves working slip stitches or single crochet across the top loops of your finished fabric—like embroidery with yarn. Overlay crochet, on the other hand, builds raised textures by layering stitches over previous rows, often following a chart or pattern. Surface crochet is great for freeform embellishment, while overlay crochet is more structured and geometric.
📏 Can I use different yarn weights when crocheting on crochet?
You can—but it depends on your goal. For decorative accents like vines or lettering, a thinner yarn can add delicate contrast. For structural joins or borders, it’s best to match the original yarn weight to maintain drape and durability. If you’re unsure, swatch a small section first to test how the layers interact.
🌸 How do I attach appliqués using crochet stitches?
To attach a motif (like a flower or star) using crochet, position it on your base fabric and use slip stitch or single crochet around the edges to secure it. This method is softer and more flexible than sewing, and it blends beautifully with the original piece. Stitch markers can help you plan placement before committing.
🔗 What’s the best way to join crochet panels without sewing?
Crochet joins like slip stitch seams, whip stitch, or decorative picot edging are great alternatives to sewing. They’re especially useful for patchwork garments, shrugs, and blankets. Align your panels carefully, use stitch markers to keep things even, and choose a joining method that suits your desired texture—flat, raised, or decorative.
🧼 Will crocheting on crochet affect stretch or drape?
It can, depending on the technique and yarn. Surface crochet and appliqués may slightly stiffen the fabric, especially if worked densely. Joins and borders can add structure or weight. If you’re working on a wearable piece, test your technique on a swatch first to see how it behaves when worn or blocked.
Crochet on crochet is all about layering intention, texture, and creativity. Whether you’re adding a fairycore flourish or reinforcing a cozy shrug, these techniques invite you to play, personalize, and stitch gently. Still curious? Drop your questions in the comments or tag me on social—I’d love to see what you’re working on.
💬 Final Thoughts: Stitching Softly, Layering Intention
Crochet on crochet is more than a technique—it’s an invitation to revisit, reimagine, and gently enhance the pieces you’ve already made. Whether you’re adding a scalloped border to a beloved blanket, joining panels for a patchwork shrug, or embellishing with fairycore appliqués, every stitch layered on stitch is a quiet celebration of creativity and care.
You don’t need perfection. You don’t need a plan. You just need yarn, curiosity, and a little space to play.
If you’re ready to try it, start with a simple surface stitch or join—and let your hands guide the rest.
🧶 Want more cozy crochet tutorials and patterns ? Explore these comfort-core favorites:
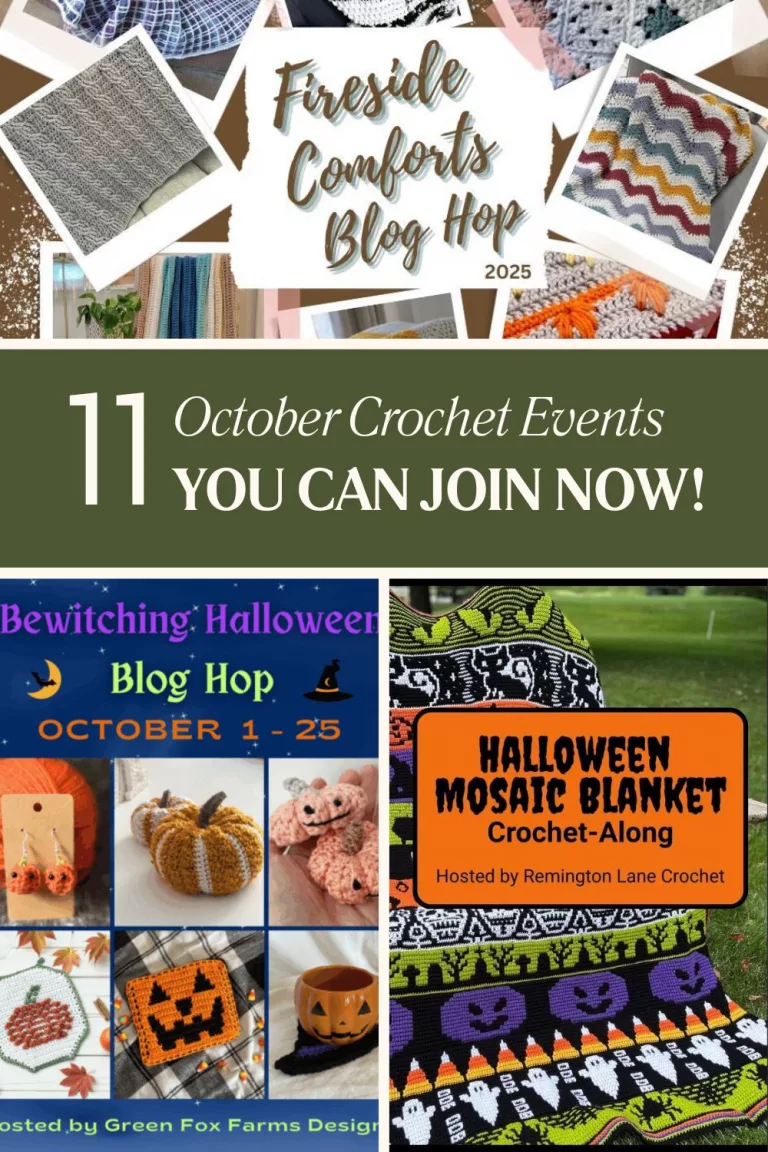
- 11 October Crochet Events You Can Join Now: Blog Hops, CALs & a Challenge for Good
- 5 FREE Leaf Crochet Patterns to Celebrate Fall
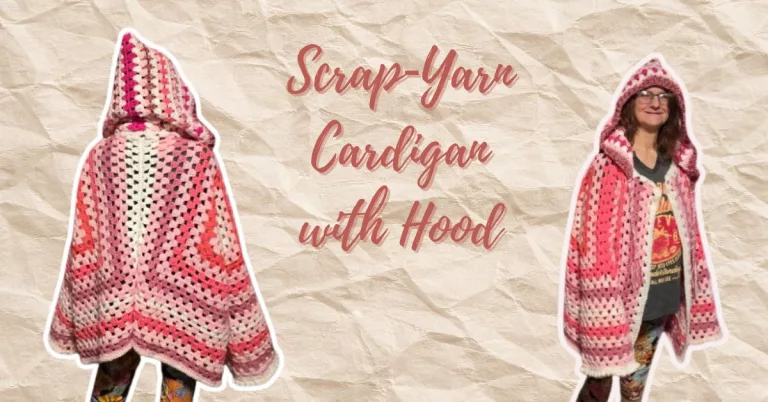
- Bell Sleeve Fairy Shrug Free Crochet Pattern
- How to Make a Magic Circle: Tips, Variations, and Troubleshooting
Tag your makes @realangelwingsit on Instagram or Pinterest or share them in the Angel Wings It Crochet & Comfort Group—I’d love to see what you’re layering next.
Stay soft, stay magical, and stitch gently 💜